POS Billing Screen
The POS Billing module provides a fast and interactive interface for product selection, billing, and customer checkout. Below is a comprehensive guide on how to use all features of the billing screen.
Screen Layout Overview

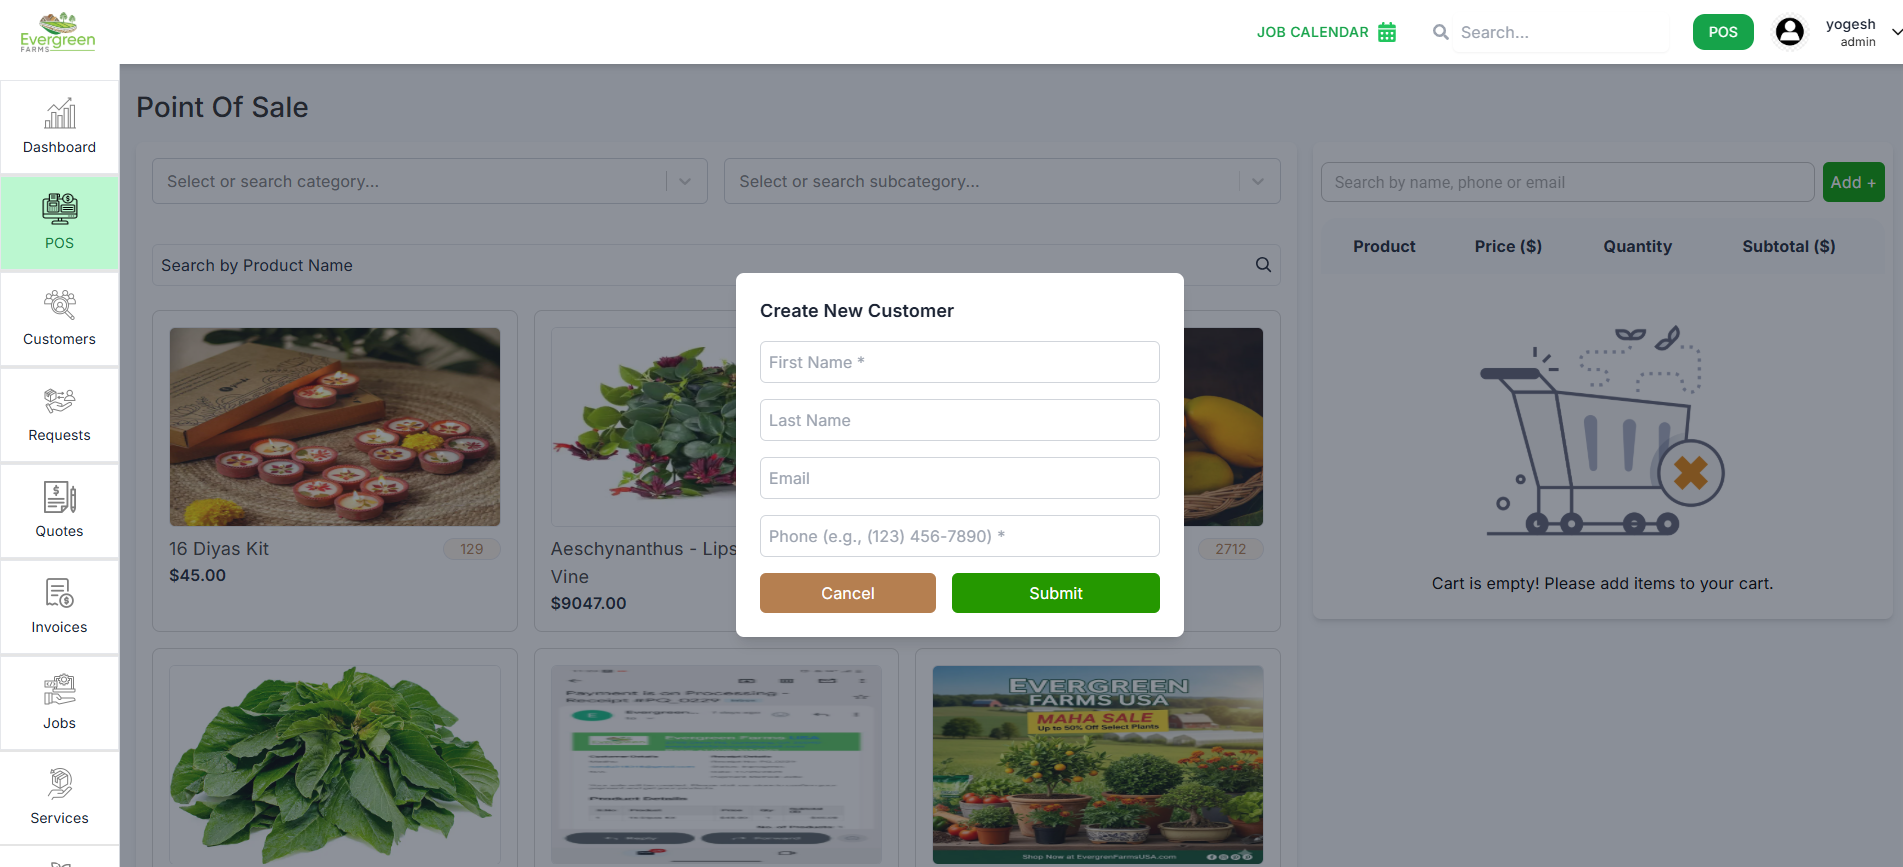
1. Customer Management
✅ Customer Selection:
- Mandatory First Step: You must select a customer before adding any products
- Customer Details Display: Shows name (e.g., "Bobby sal") and phone number (e.g., "5224555555")
- Delivery Options: Choose between "Take Away" or "Delivery"
⚠️ Important: Products cannot be added to cart until a
customer is selected.
2. Product Selection
✅ Adding Items:
- Category Navigation: Browse products by category (e.g., "PC3", "Customers", "Requests")
- Product Display: Shows product name and price (e.g., "Almoda $11.00", "Avakado Tree $1.00")
- Quick Search: Use the "Search by Product Name or Code" field to find specific items
- Check Out: Finalize the transaction and complete the sale
- Reset: Clear the current transaction and start fresh
- Net Total: Verify the final amount (e.g., "$23.54") before completing
Tip: Each click on a product adds one quantity to your
cart automatically.
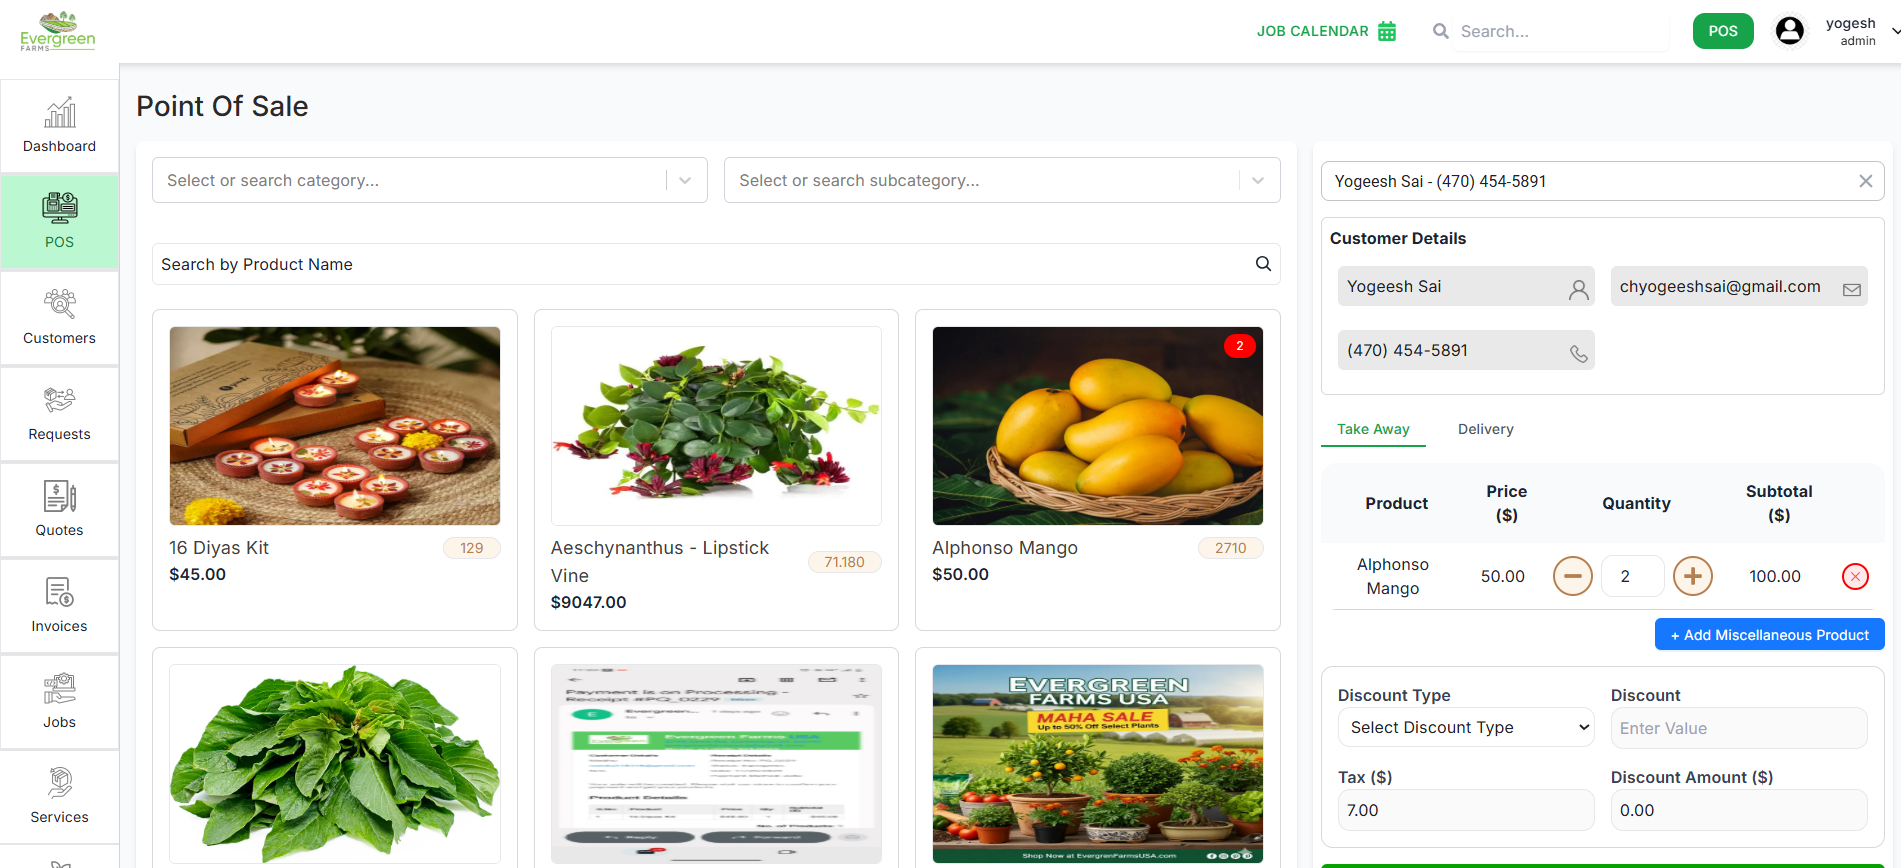
3. Order Management
✅ Order Summary:
- Itemized List: Shows all selected products with quantities
- Price Calculation: Automatic calculation of subtotals
- Discount Application: Use "Select Discount Type" dropdown to apply discounts
- Tax Calculation: System automatically calculates tax (e.g., "$1.54")
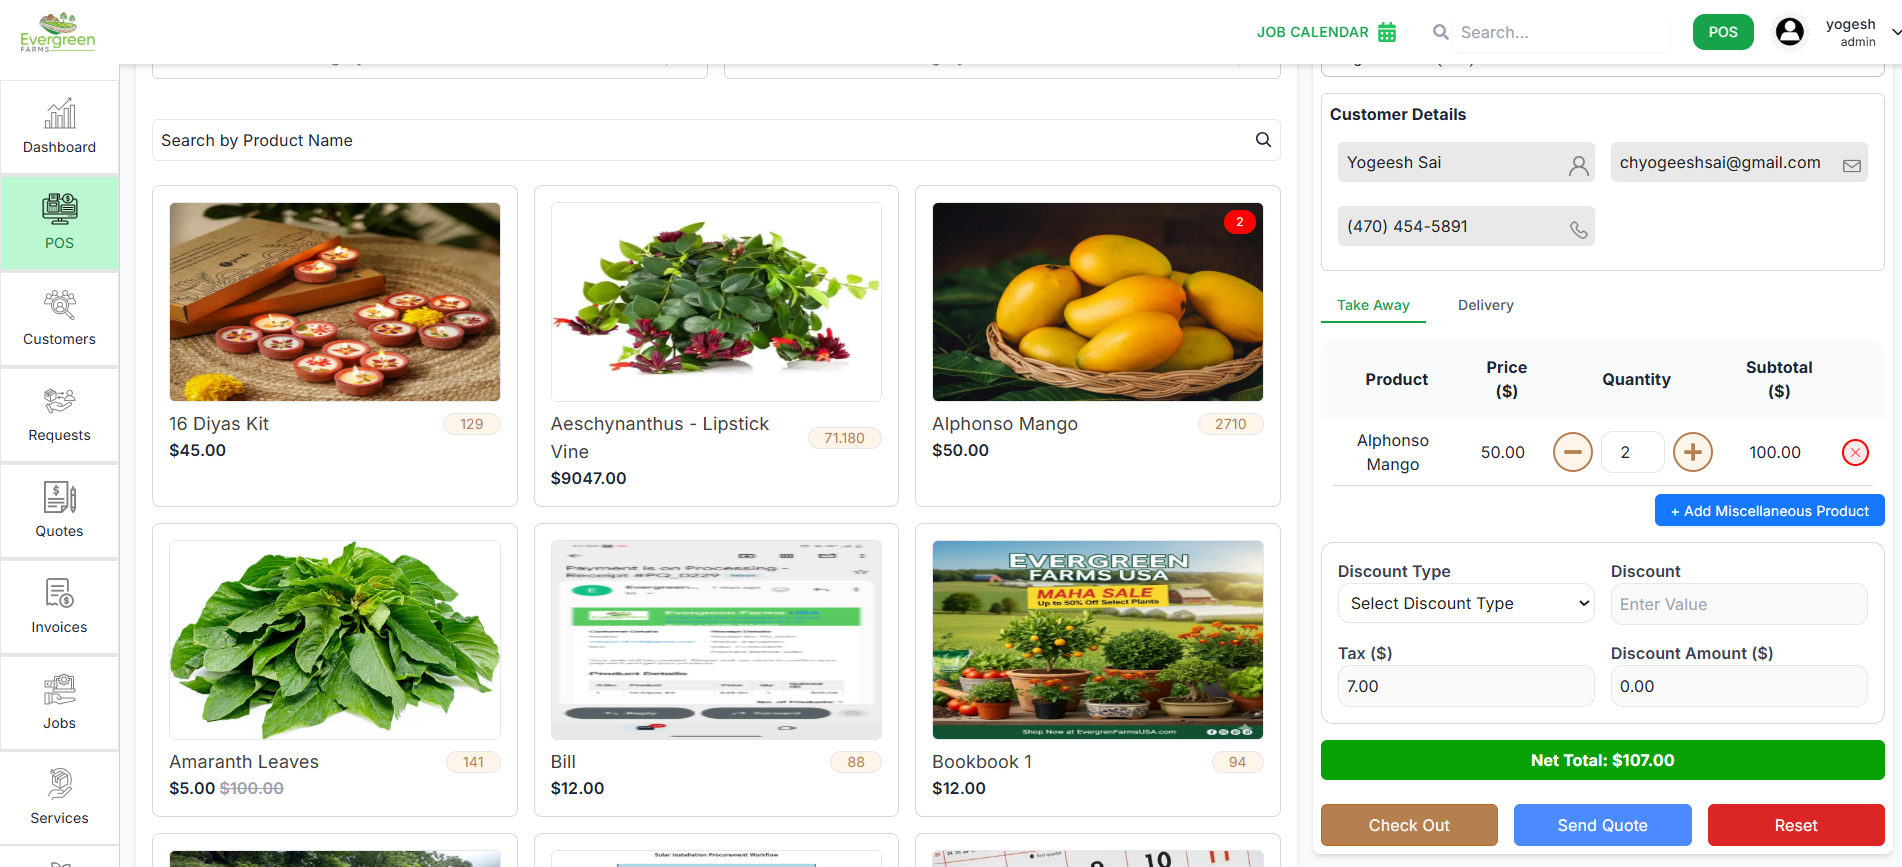
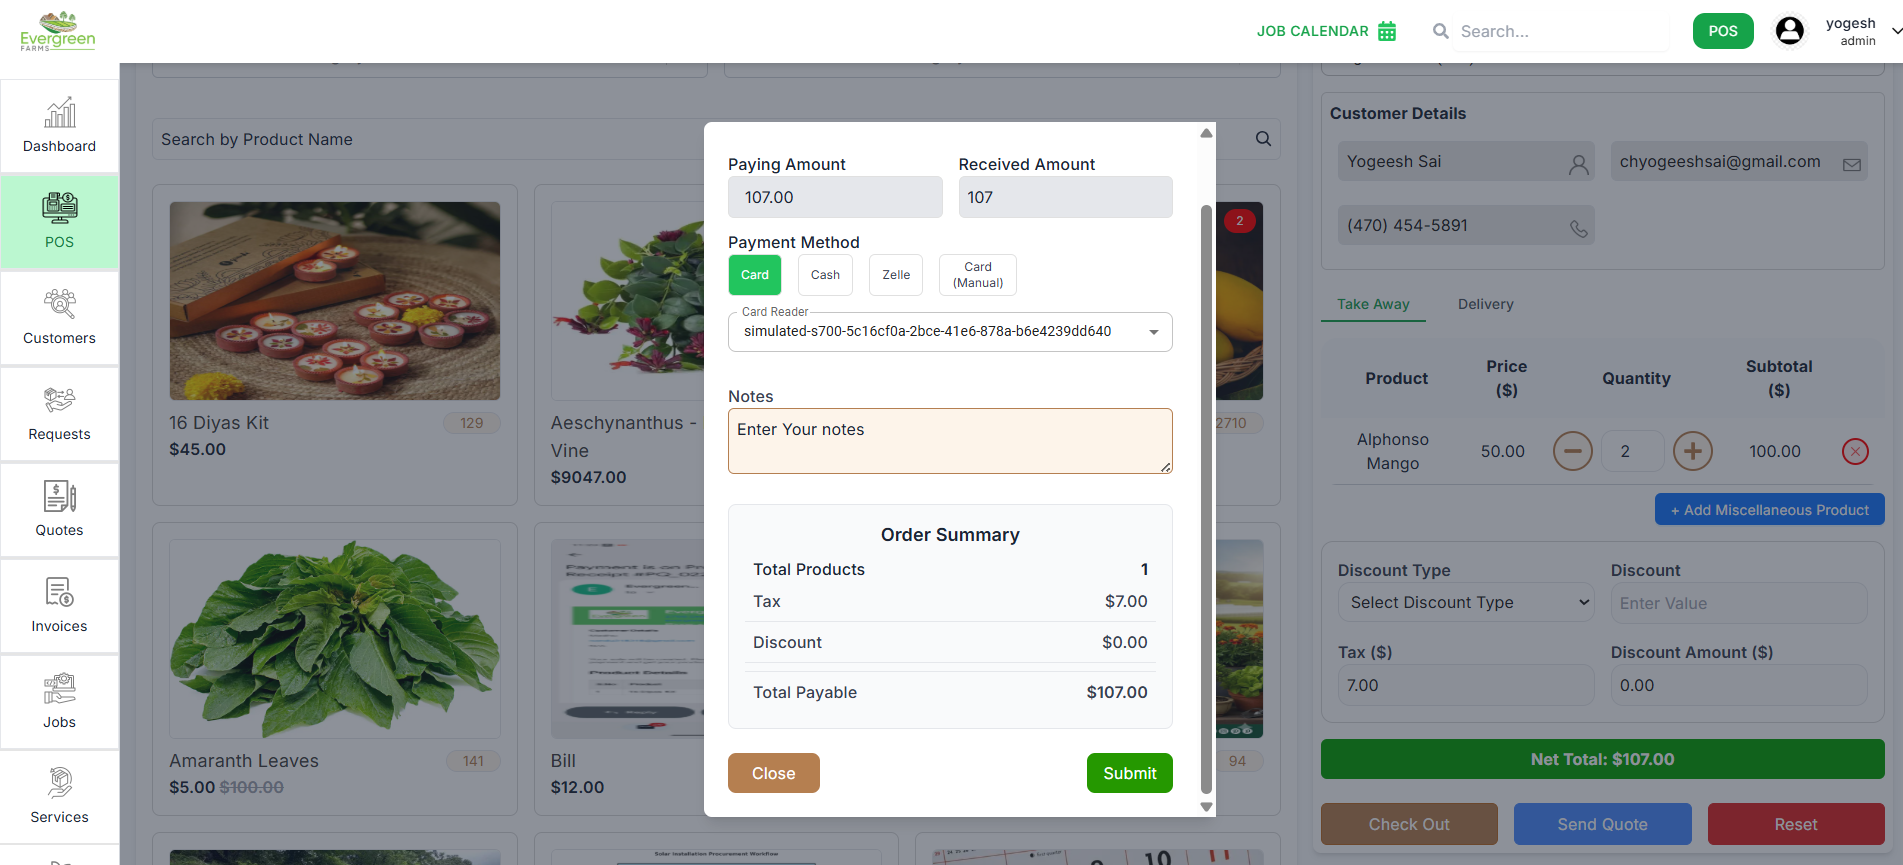
4. Payment Processing
✅ Completing Transaction:
- Payment Amount: Displays total amount due (e.g., "23.54")
- Payment Method: Select from available payment options
- Order Notes: Add special instructions in "Enter Your notes" field
-
Final Summary: Clear breakdown of:
- Total Products
- Tax amount
- Discounts applied
- Shipping charges
- Total Payable amount

💳 Payment Options Guide:
- Card: Used when the customer pays using a credit or debit card. Supports integration with a card reader device (automatically detects connected reader). You can also process card payments manually if the reader is unavailable.
- Cash: Used for direct cash payments. The system automatically calculates the change return based on the entered amount. Ideal for walk-in or offline customers.
- Zelle: Supports Zelle online transfer. Enter the received amount once the payment is confirmed. Usually used for digital or contactless transactions.
- Card (Manual): Allows manual entry of card details if the reader device is disconnected or not functioning. The operator can process payment manually through a secure terminal.
- Send Invoice: Used when the customer prefers to pay later. The system sends a digital invoice to the customer’s registered email. Commonly used for business clients or delayed payments.
🧾 Example Flow:
- Enter the Paying Amount and check the Change Return.
- Select the desired Payment Method (e.g., Cash, Card, Zelle, etc.).
- Add any Notes in the “Enter Your Notes” field.
- Review the Order Summary section:
- Total Products
- Tax
- Discount
- Total Payable
- Click Submit to finalize the payment and generate the receipt.
5. Final Actions
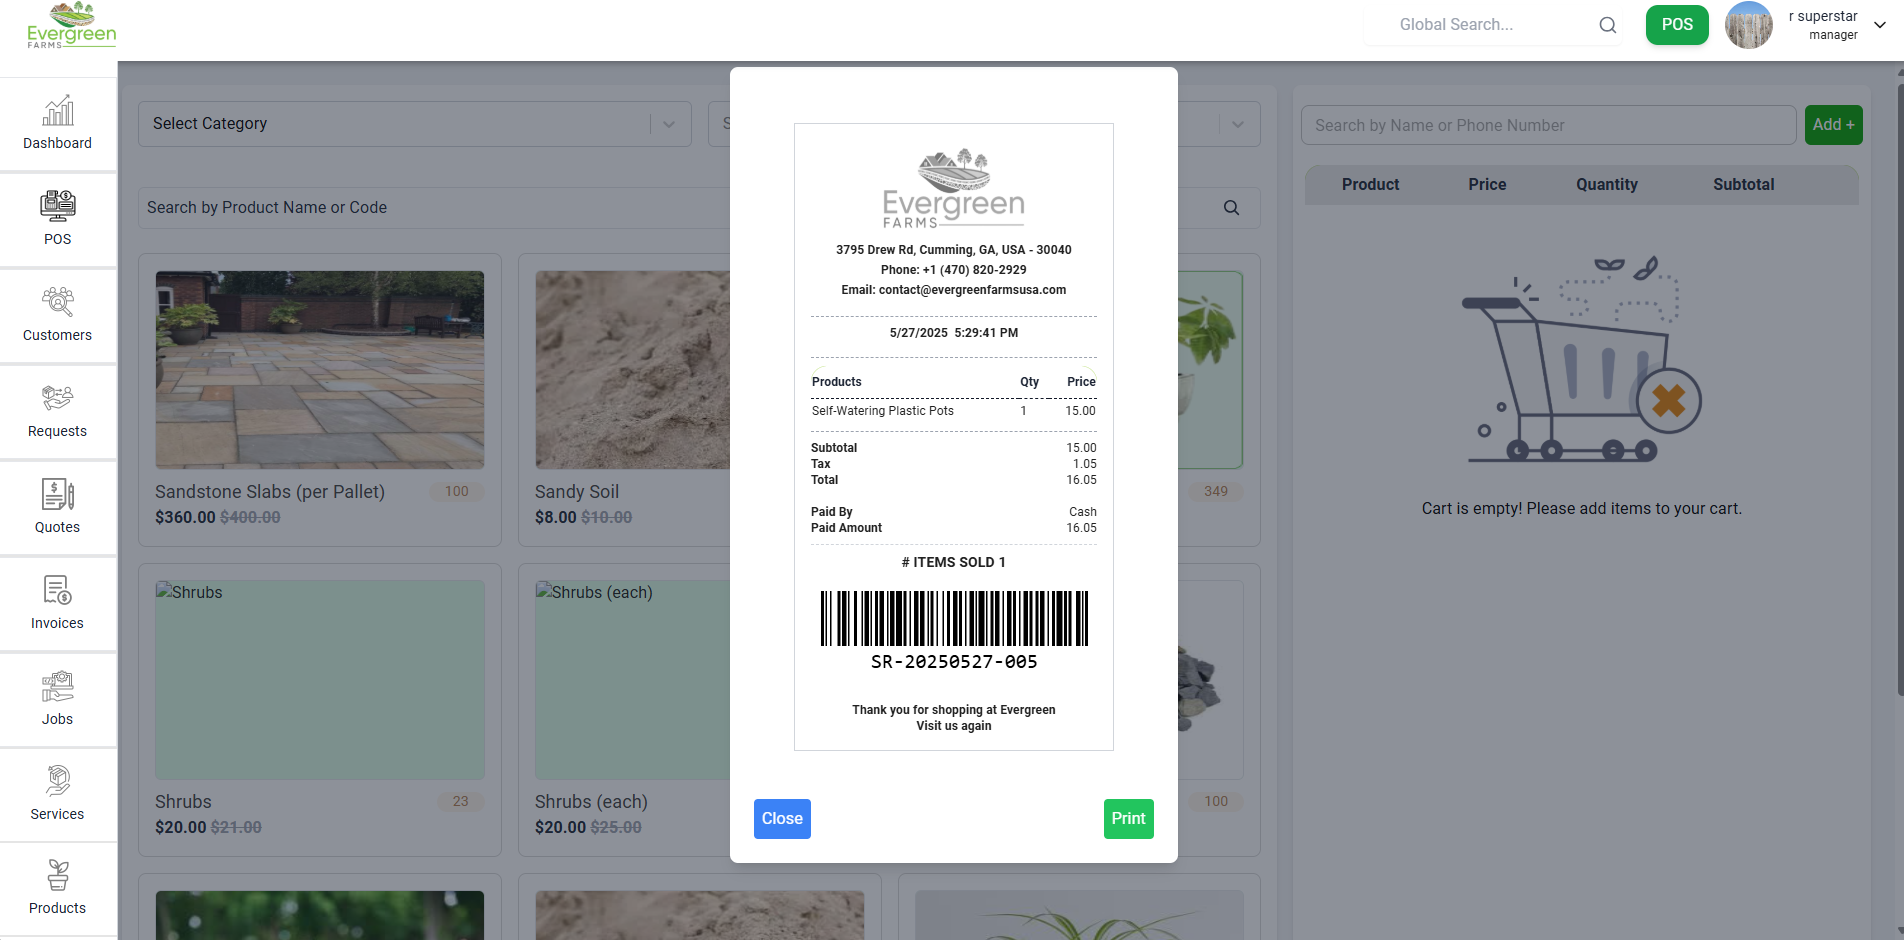
- Review Total Payable: Check the "Total Payable" amount in the Order Summary ($16.05).
- Confirm Order Summary: Verify Total Products (1), Tax ($1.05), Discount ($0.00), and Shipping ($0.00).
- Enter Received Amount: Input the amount you're paying (e.g., $20) in the "Received Amount" field.
- Check Change Return: Confirm the "Change Return" (e.g., $3.95 for $20 received).
- Select Payment Method: Choose your method (e.g., Cash) from the "Payment Method" dropdown.
- Add Notes (Optional): Include any notes in the "Notes" section if needed.
- Cancel if Needed: Click "Close" to exit without processing.
- If payment successful
Troubleshooting
❌ Common Issues:
- Products not adding to cart? Ensure you've selected a customer first
- Incorrect totals? Check discount and tax settings
- Missing payment options? Contact system administrator
Best Practice: Always review the Order Summary before
finalizing payment to ensure accuracy.