Warehouse Management
The Warehouse Management module is used to manage various locations, blocks, floors, zones, aisles, bays, racks and products so that user can fetch the products at which location product is available.
Locations ➝ Buildings ➝ Floors ➝ Zones ➝ Aisles ➝ Bays ➝ Racks ➝ Products
✅ What you can do here:
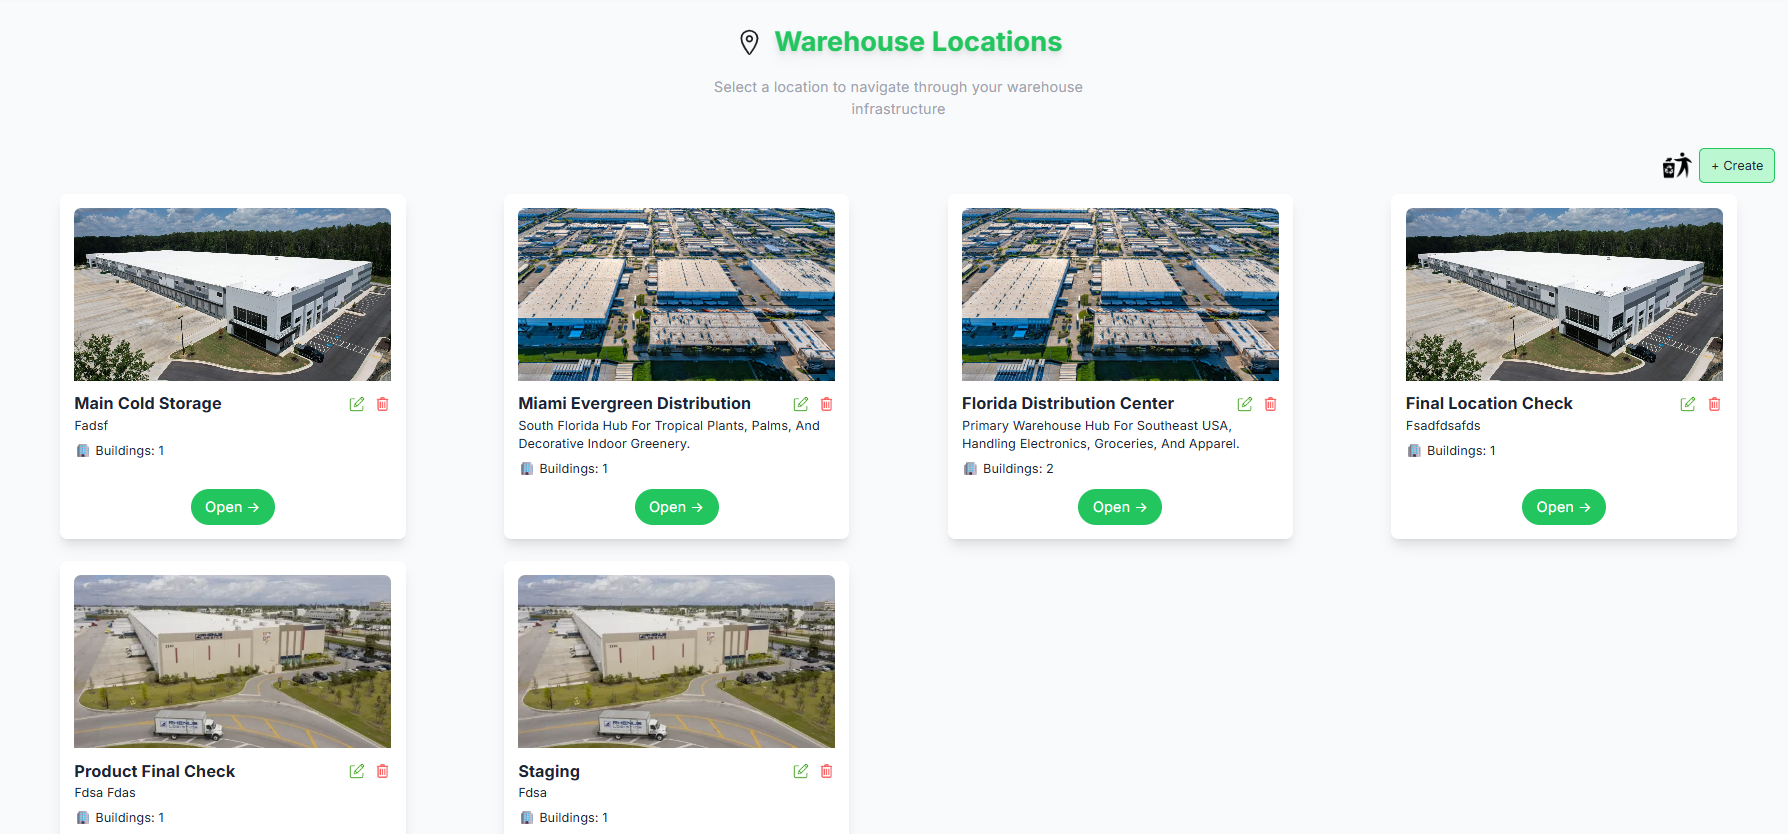
- View list of available locations here
-
Click the "
 " icon to view the locations which are deleted.
- Create new location by clicking " + Create "
-
The
"
 " icon refers to Action History if you hover on it the
whole actions performed on that table record is shown.
" icon refers to Action History if you hover on it the
whole actions performed on that table record is shown.
-
The
"
 "
icon refers to edit the location you can Edit the
location name, description, appartment, street, city, state and zipcode.
"
icon refers to edit the location you can Edit the
location name, description, appartment, street, city, state and zipcode.
-
The
"
 "
icon refers to delete the location you can Delete the
location , leave a reason for deletion in comment. If the location has buildings associated with it, you
cannot delete the location.
"
icon refers to delete the location you can Delete the
location , leave a reason for deletion in comment. If the location has buildings associated with it, you
cannot delete the location.
- Each location has a building or buildings associated with it. It is shown on the location card.
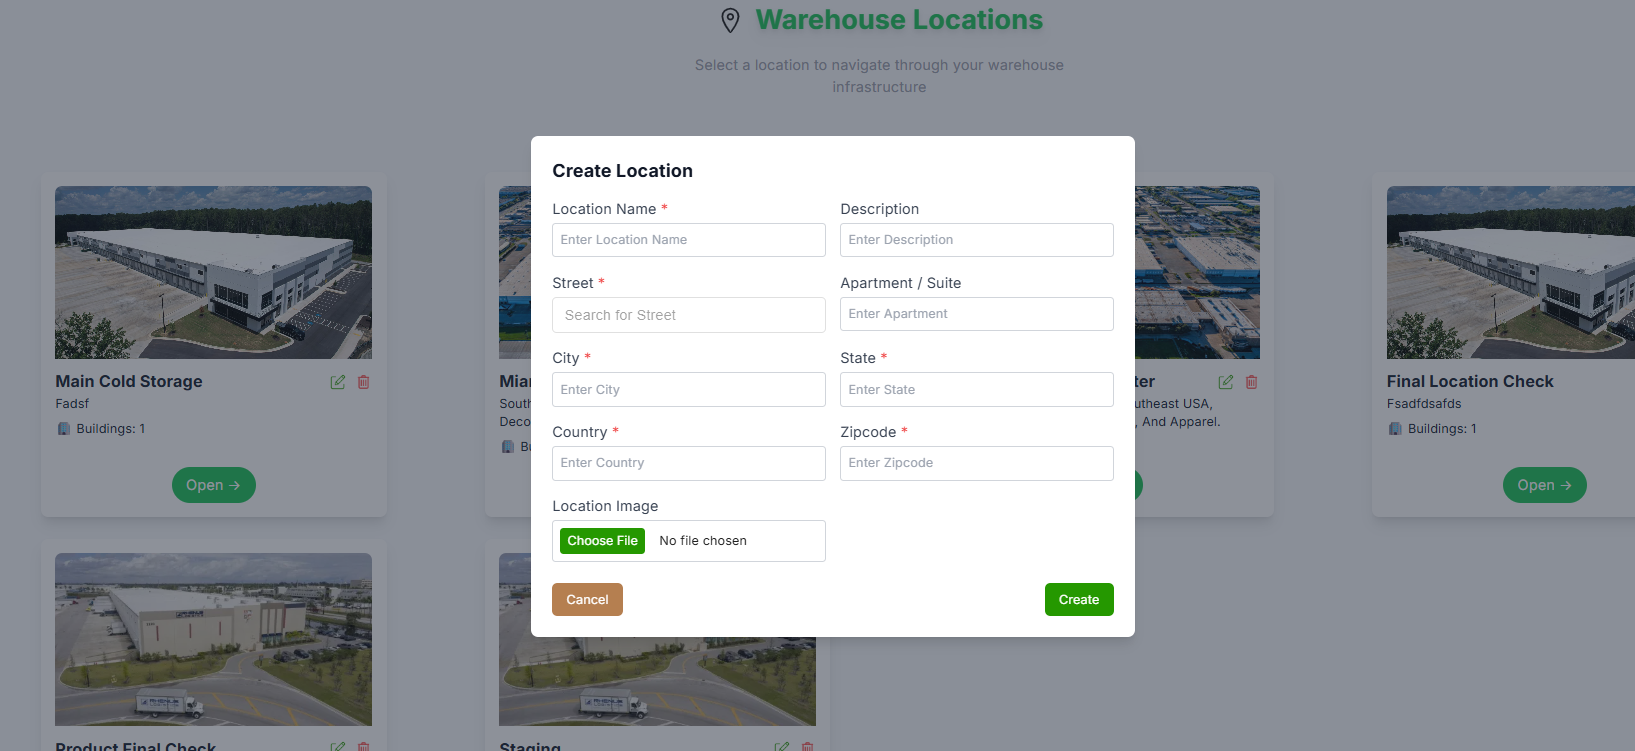
When the user clicks the “Create” button (top-right), a popup modal appears.
- Enter the Location Name (Mandatory)
- Enter the Description
- Enter the Appartment
- Enter the Street (Mandatory)
- Enter the City (Mandatory)
- Enter the State (Mandatory)
- Enter the Zipcode (Mandatory)
- Give the Image
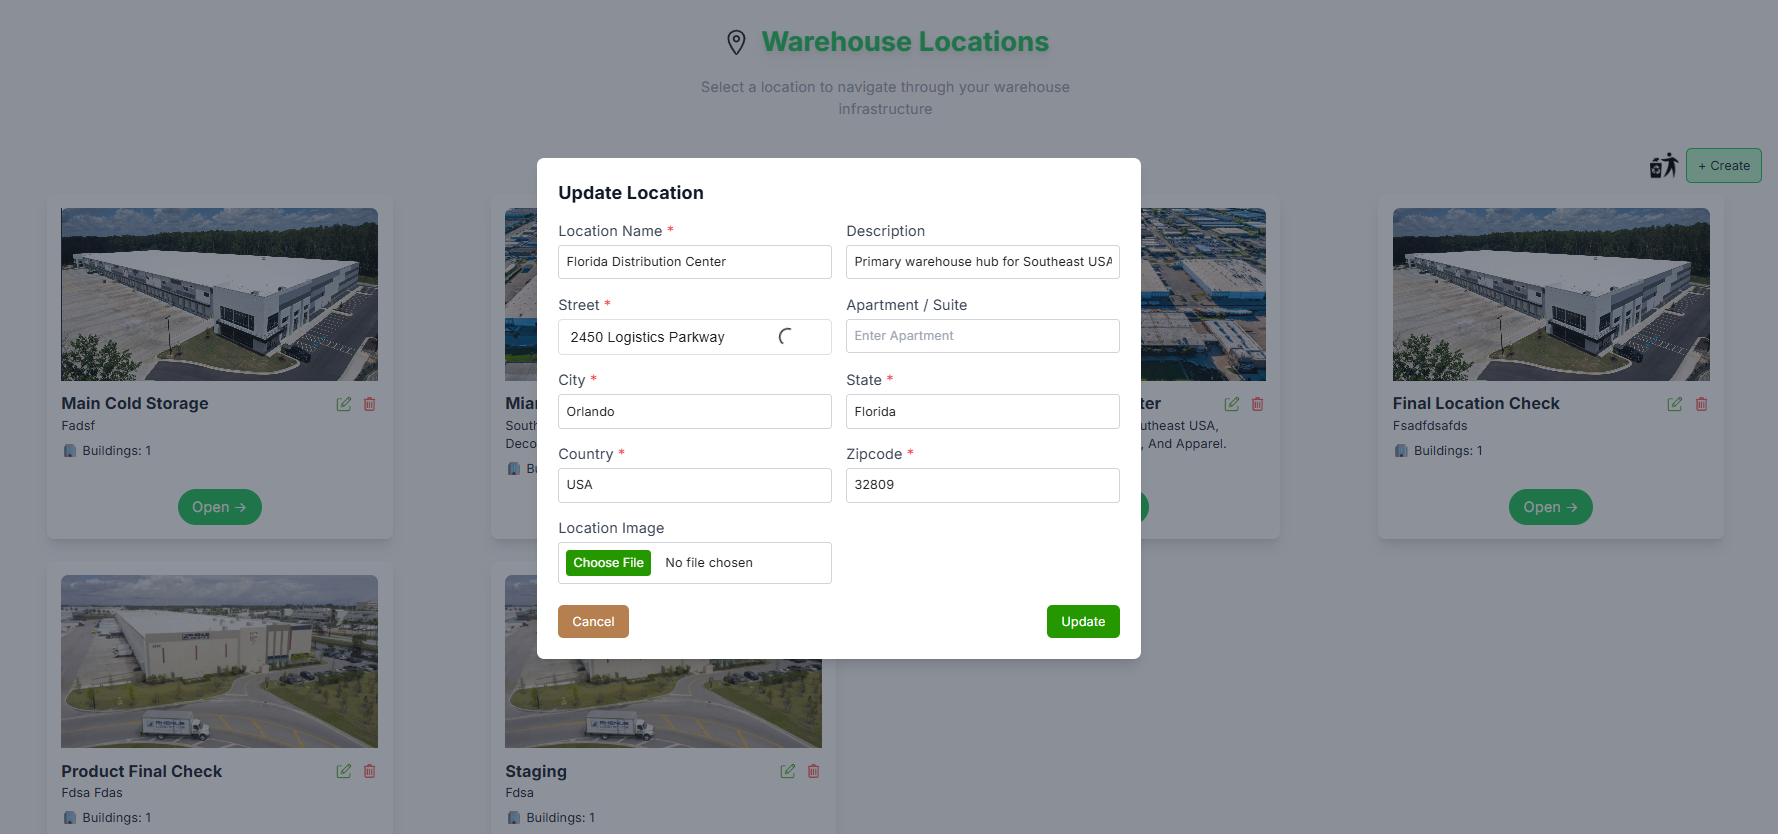
When the user clicks the "Edit" button , a popup modal appears.
- Re-enter the Location Name (Mandatory)
- Re-enter the Description
- Re-enter the Appartment
- Re-enter the Street (Mandatory)
- Re-enter the City (Mandatory)
- Re-enter the State (Mandatory)
- Re-enter the Zipcode (Mandatory)
- Give the Image
When the user clicks the "" button on the (top-right) beside create we are able to view
deleted buildings.
- Here you can see the Deleted Buildings
- You can restore the block by clicking "♻️"
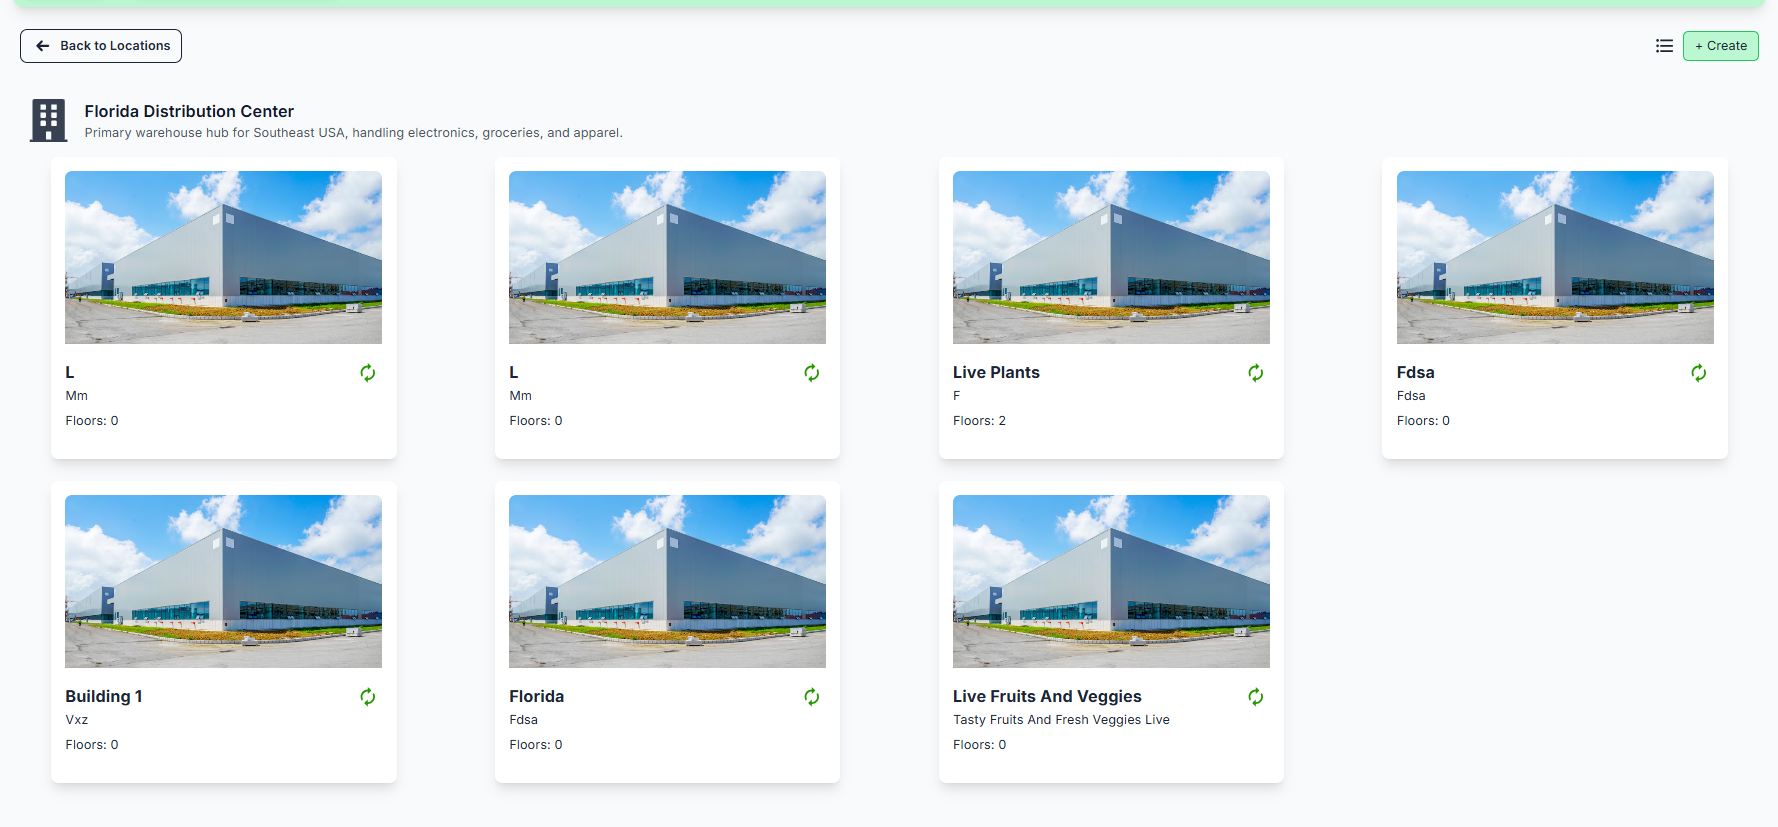
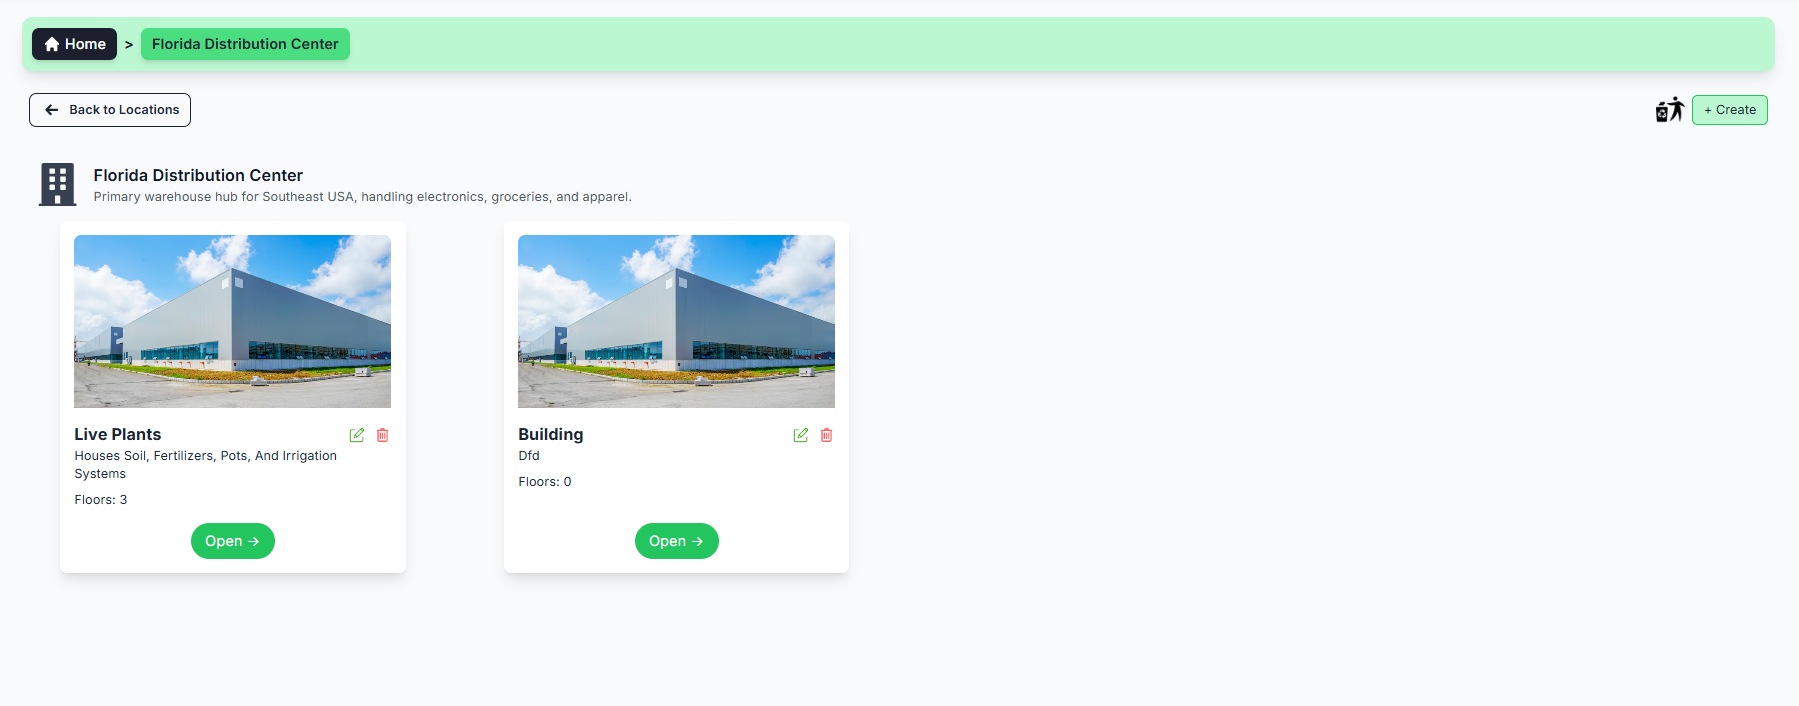
- Click on the "open" button to open the location and you can see the buildings created under it
✅ What you can do here:
- View list of available buildings here
-
Click the "" icon to view the buildings which are deleted.
- Create new building by clicking " + Create "
-
The
""
icon refers to edit the building you can Edit the
location, building name and description
-
The
""
icon refers to delete the building you can Delete the
building , leave a reason for deletion in comment. If the building has floors associated with it, you cannot
delete the building.
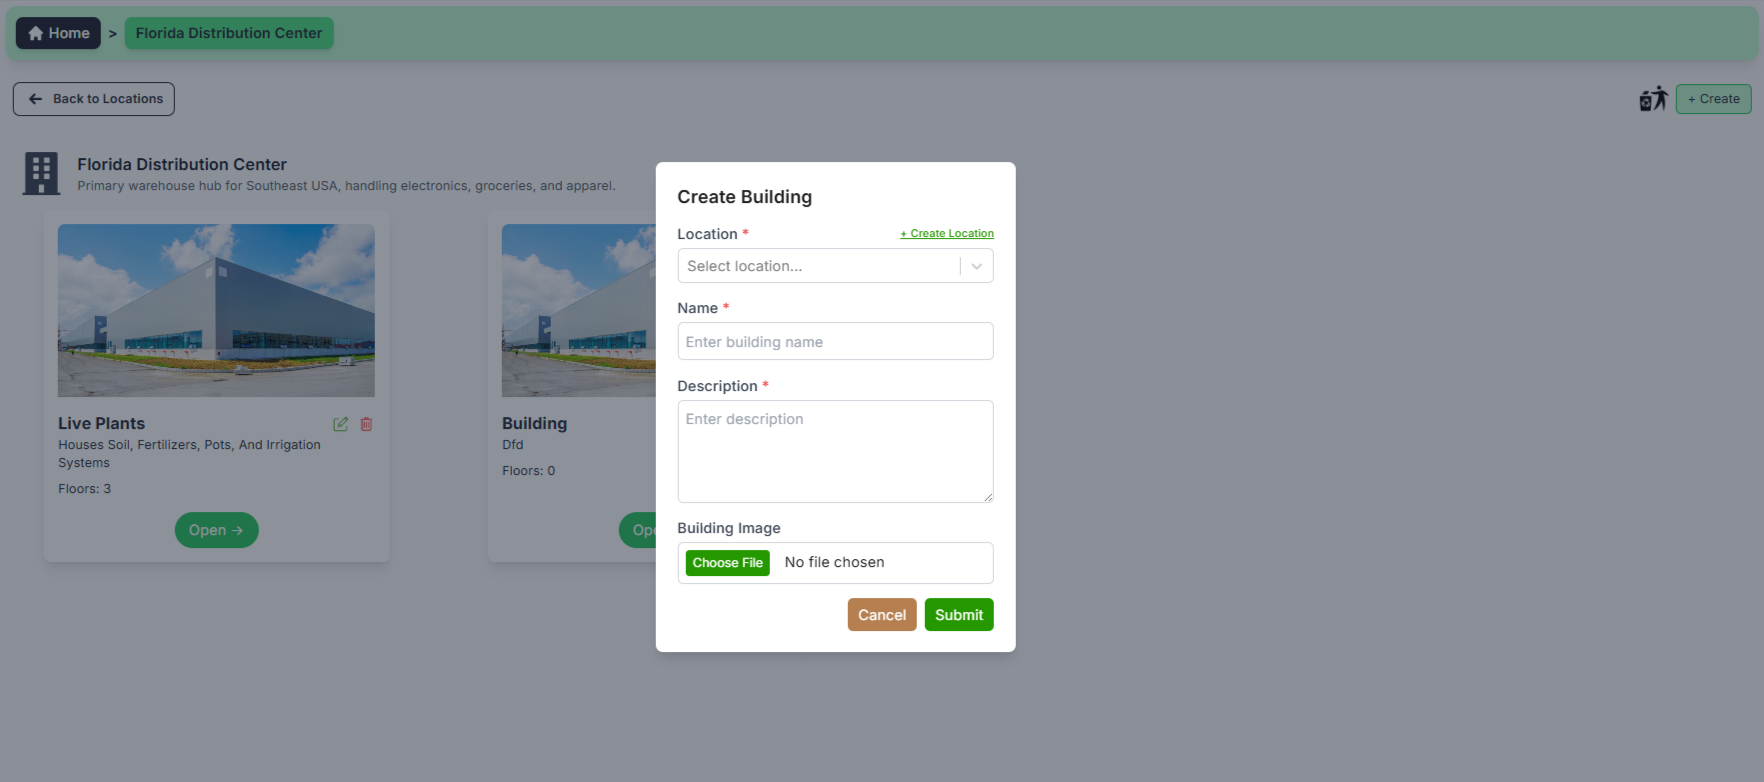
When the user clicks the “Create” button (top-right), a popup modal appears.
- Select the Location
- By clicking the Create Location you can create the Location
- Enter the Building Name
- Enter the Description
- Select the Image
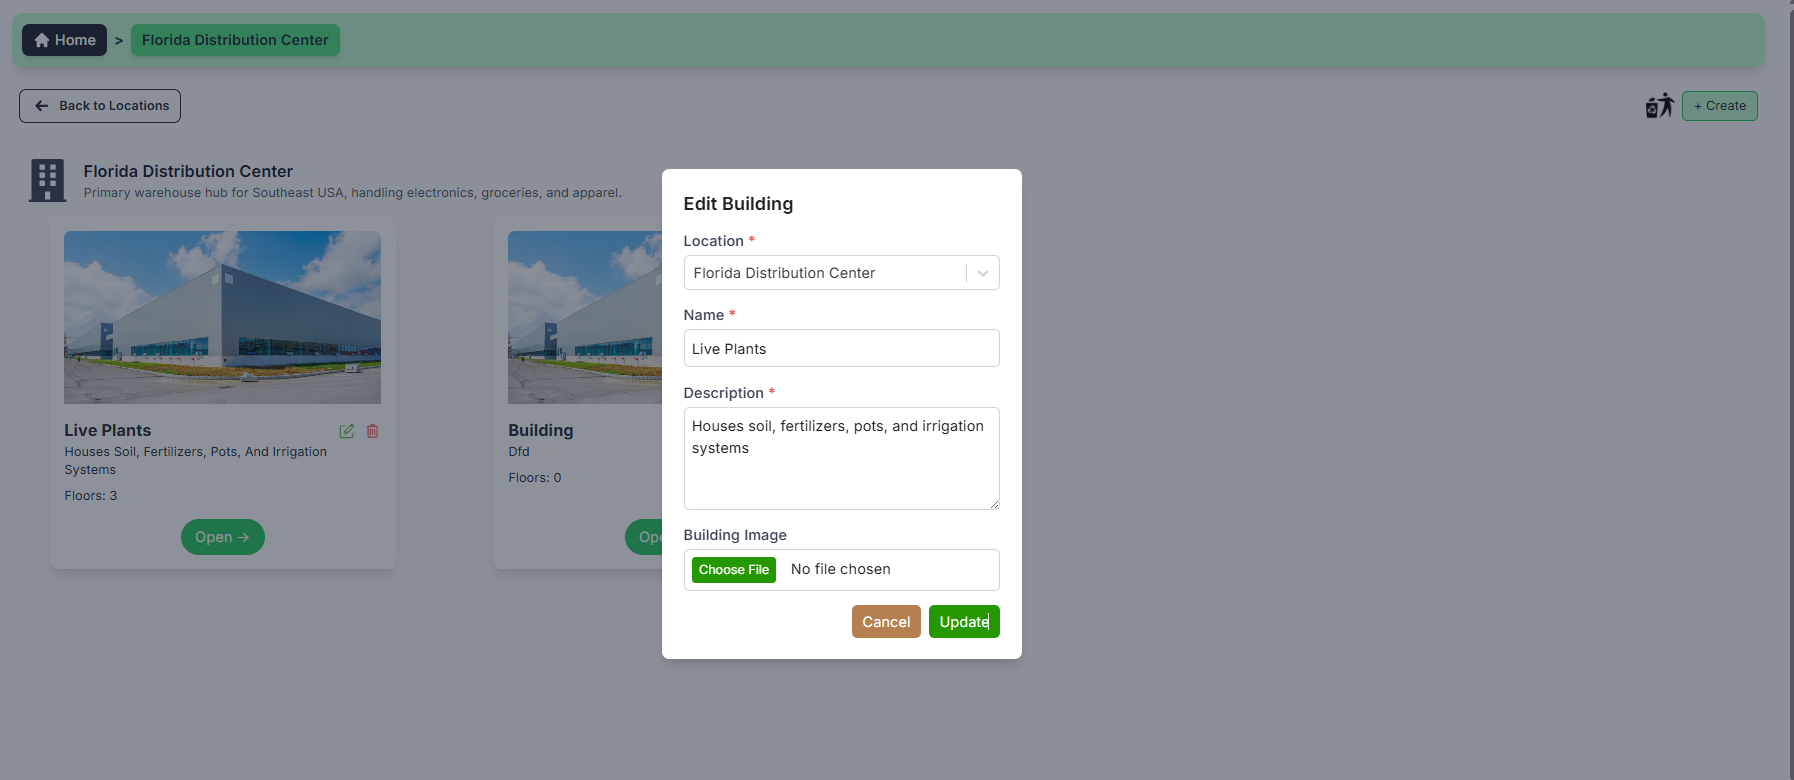
When the user clicks the “Edit” button on the card record, a popup modal appears.
- Update the Building Name
- Update the Description
- Select the Image
When the user clicks the "" button on the (top-right) beside create we are able to view
deleted buildings.
- Here you can see the Deleted Buildings
- You can restore the block by clicking "♻️"
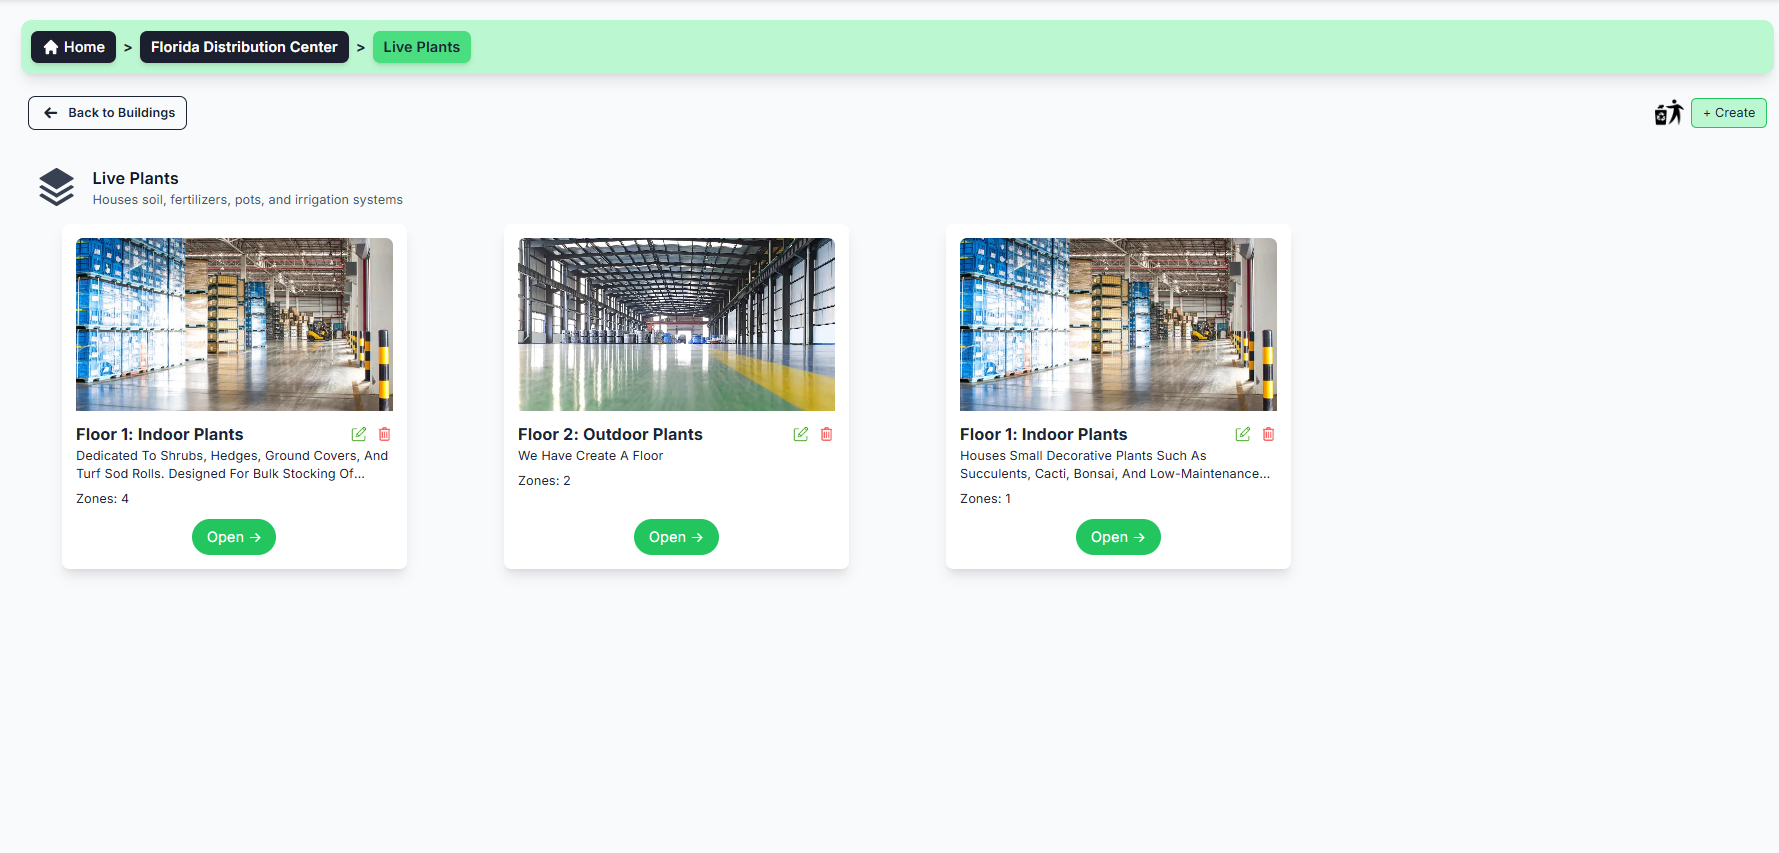
- Click on the "open" button to open the building and you can see the floors created under it
✅ What you can do here:
- View list of available floors here
-
Click the "" icon to view the floors which are deleted.
- Create new floor by clicking " + Create "
-
The
"" icon refers to Action History if you hover on it the
whole actions performed on that table record is shown.
-
The
""
icon refers to edit the floor you can Edit the
location, building, floor name and description
-
The
""
icon refers to delete the floor you can Delete the
floor , leave a reason for deletion in comment.
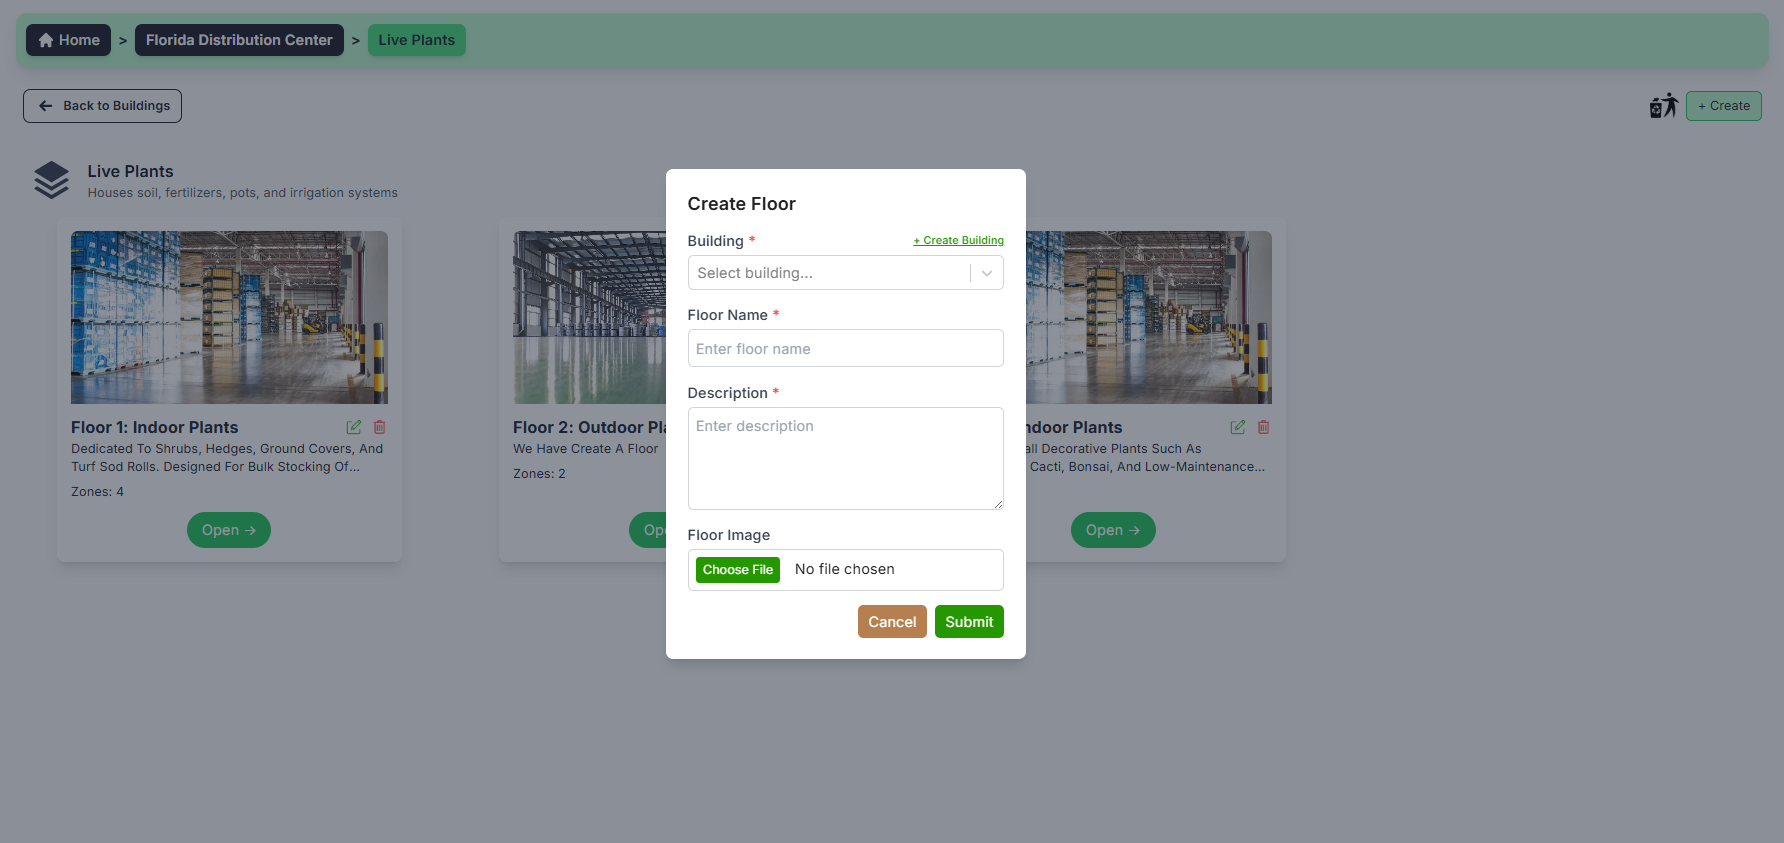
When the user clicks the “Create” button (top-right), a popup modal appears.
- Select the Building
- By clicking the Create Building you can create the Building
- Enter the Floor Name
- Enter the Description
- Give the Image
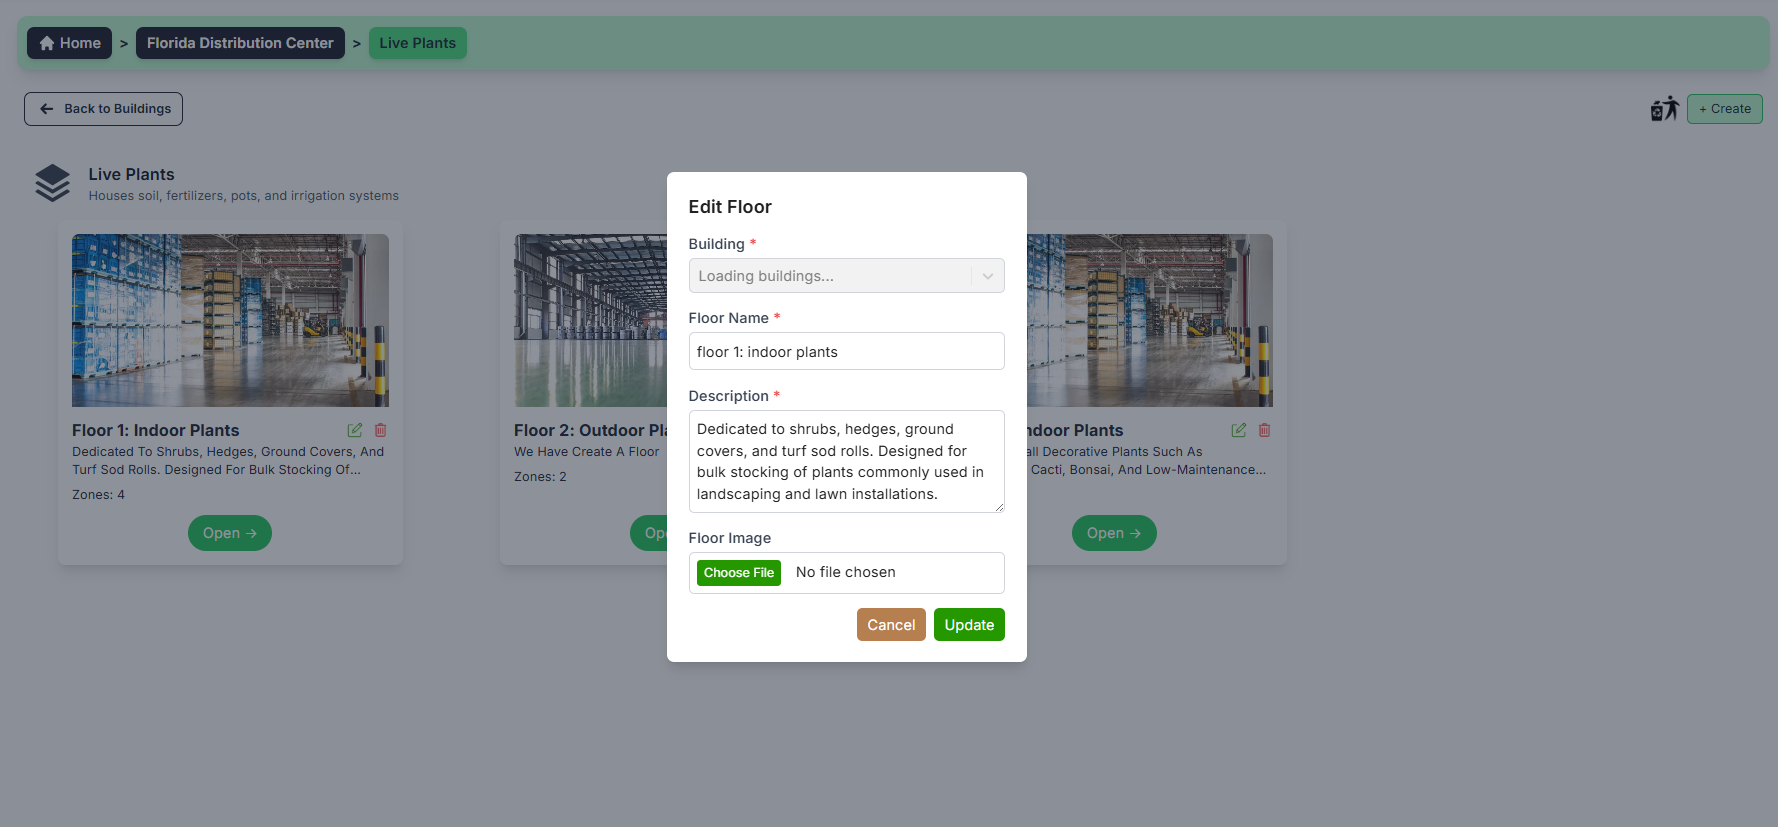
When the user clicks the “Edit” button on the table record, a popup modal appears.
- Change the Building
- Update the Floor Name
- Update the Description
- Give the Image
When the user clicks the "" button on the (top-right) beside create we are able to view
deleted floors.
- Here you can see the Deleted Floors
- You can restore the block by clicking "♻️"
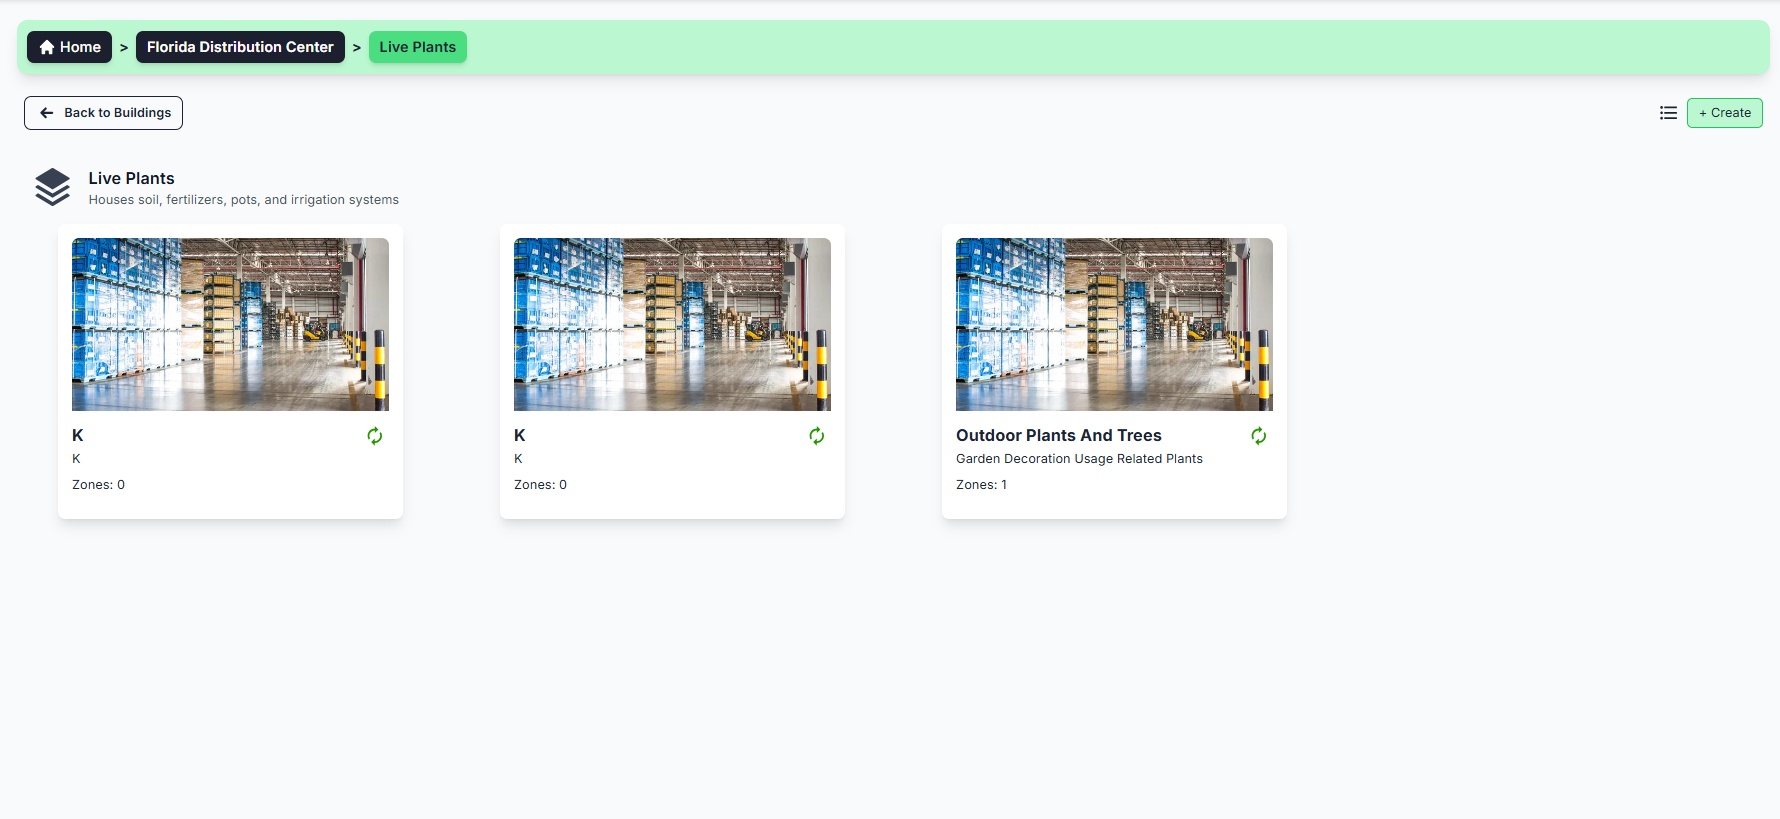
- Click on the "open" button to open the floor and you can see the zones created under it
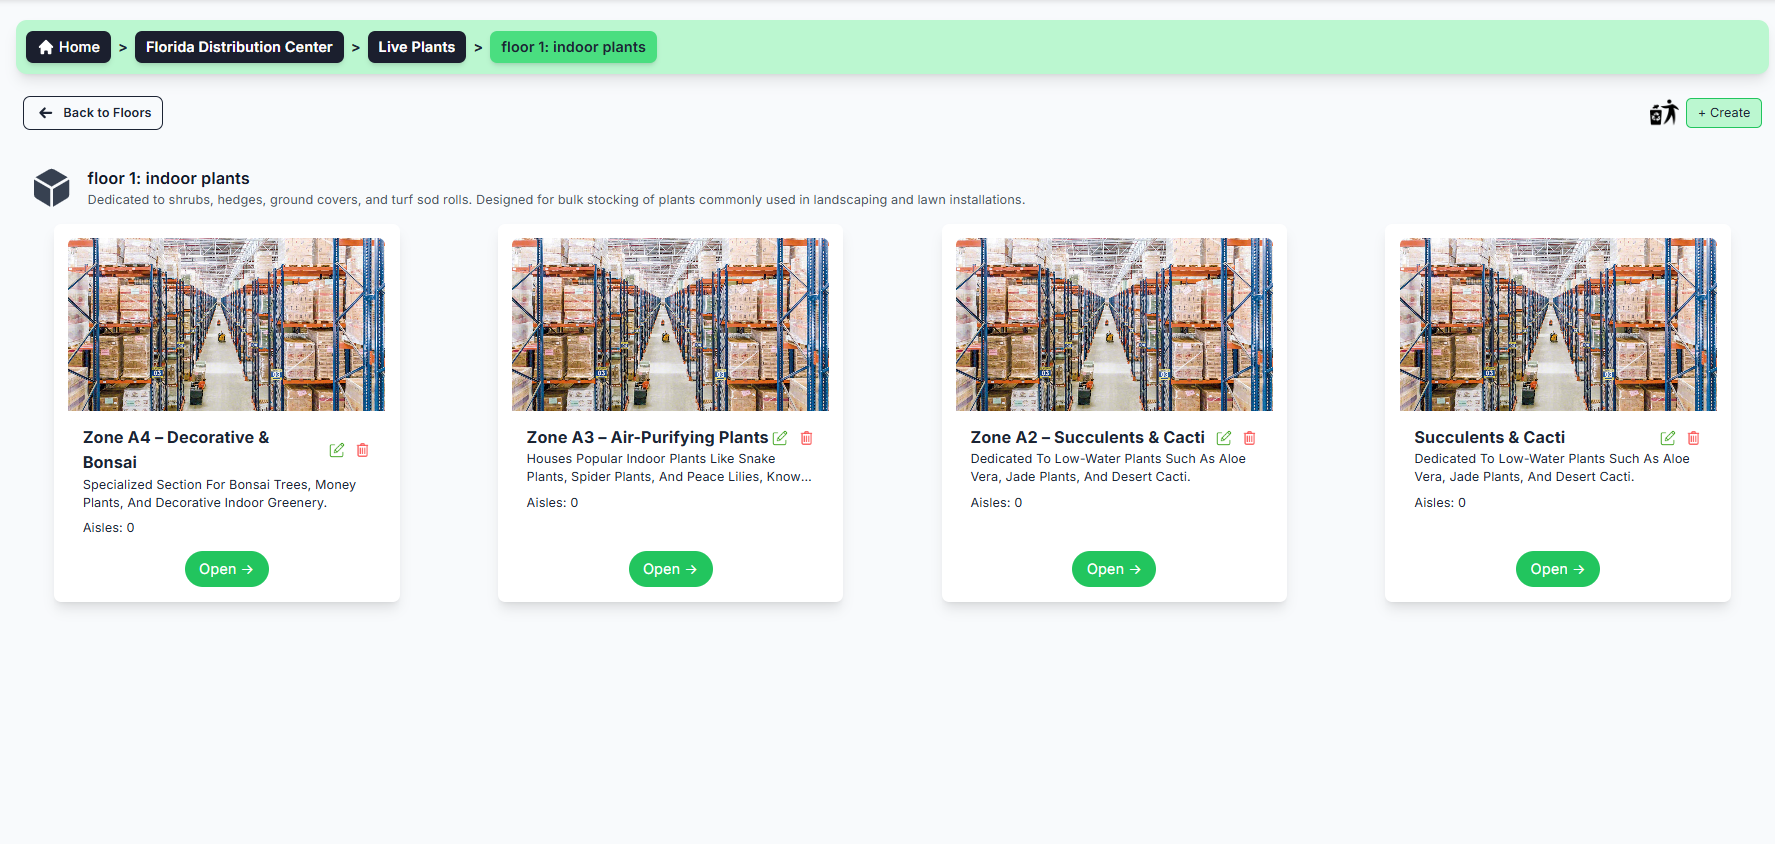
✅ What you can do here:
- View list of available zones here
-
Click the "" icon to view the zones which are deleted.
- Create new zone by clicking " + Create "
-
The
"" icon refers to Action History if you hover on it the
whole actions performed on that table record is shown.
-
The
""
icon refers to edit the zone you can Edit the
location, building, zone name and description
-
The
""
icon refers to delete the zone you can Delete the
zone , leave a reason for deletion in comment.
- Click on the "open" button to open the zone and you can see the aisels created under it
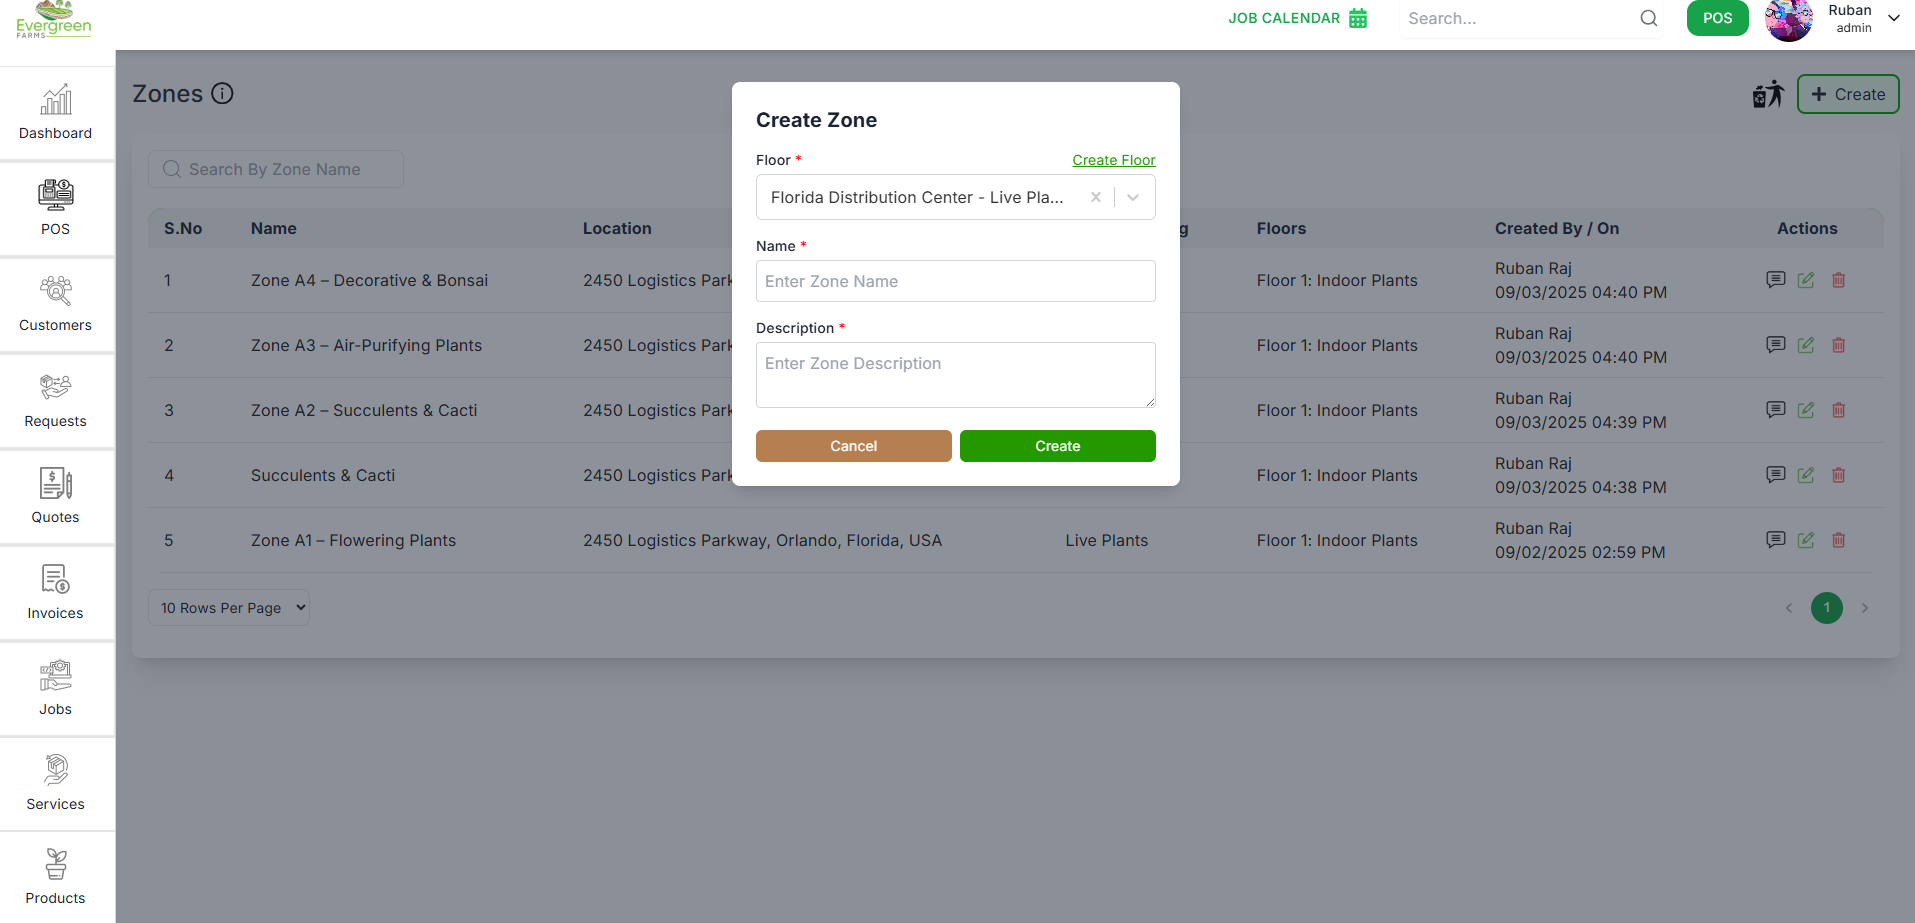
- Select the Floor
- By clicking the Create Floor you can create the Floor
- Enter the Zone Name
- Enter the Description
- Give the Image
When the user clicks the “Create” button (top-right), a popup modal appears.
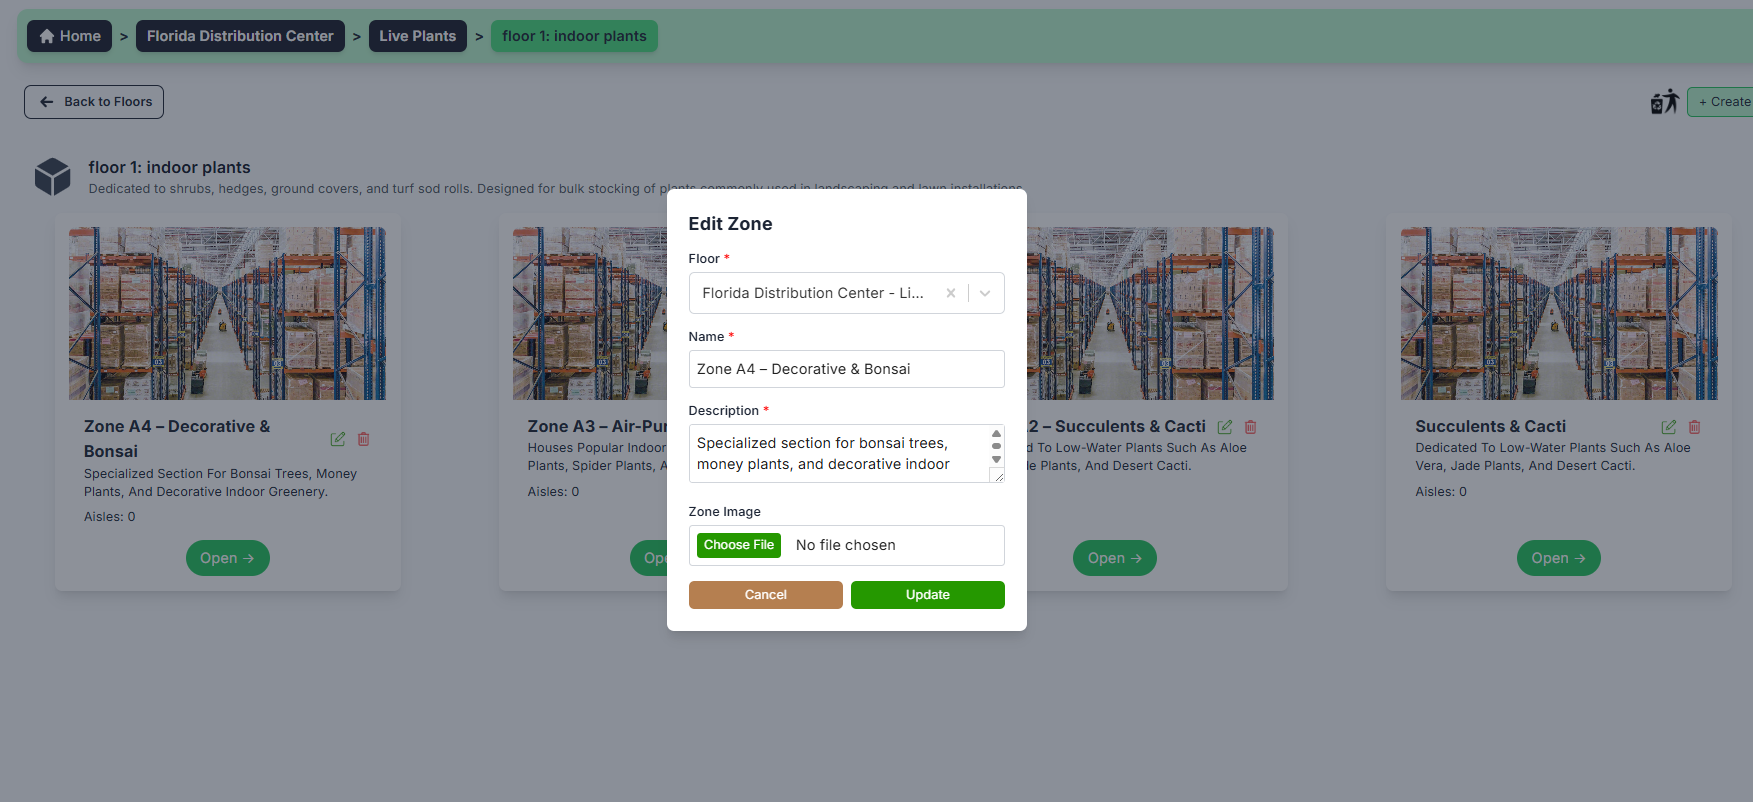
When the user clicks the “Edit” button on the card record, a popup modal appears.
- Update the zone Name
- Update the Description
- Give the Image
When the user clicks the "" button on the (top-right) beside create we are able to view
deleted zones.
- Here you can see the Deleted Zones
- You can restore the block by clicking "♻️"
The Aisle section helps organize and manage aisles within a selected zone. Each aisle represents a specific path or area inside the warehouse where racks or products are placed.
✅ What you can do here:
- View all existing aisles as individual cards under the selected zone.
- Each card displays key information such as:
- Aisle Name (e.g., Aisle 1, Aisle 2, etc.)
- Description (e.g., “Pre-Painted Fence Parts and Coated Panels”)
- Bays count
- Use the “+ Create” button to add a new aisle.
- Use the Edit icon on a card to update aisle details.

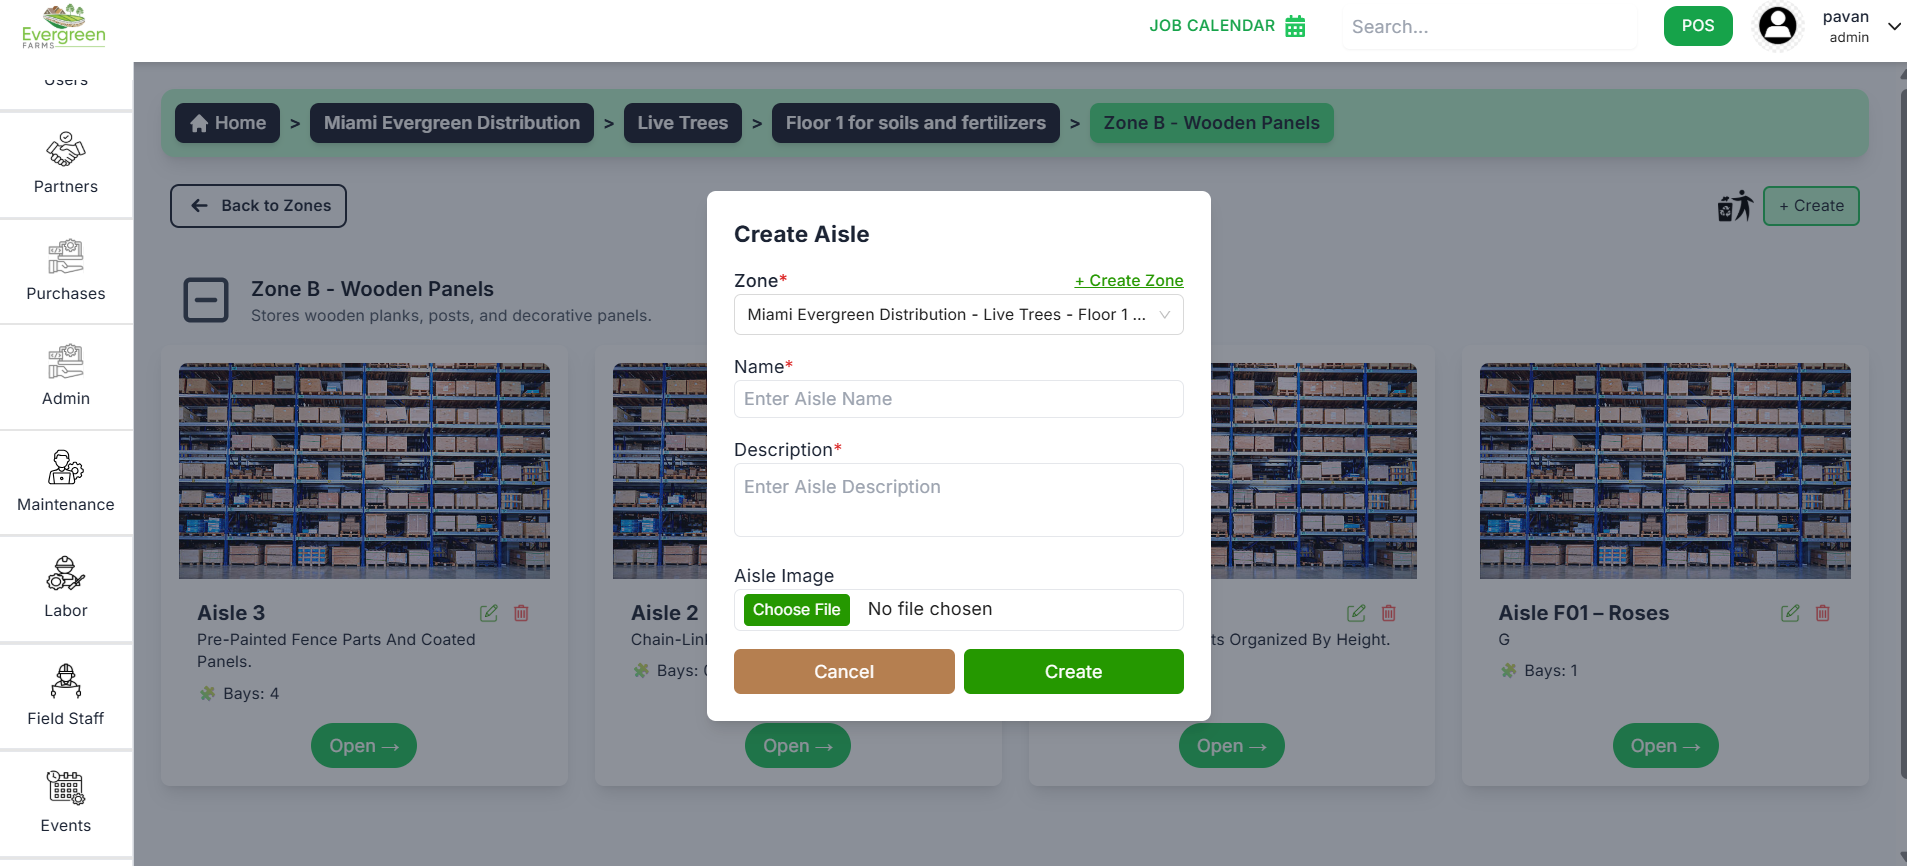
When the user clicks the “+ Create” button, a popup modal appears to create a new aisle under the selected zone.
- The Zone field automatically displays the current zone name (non-editable).
- Enter Aisle Name (e.g., Aisle 3).
- Enter Description (brief details about the aisle, e.g., “Stores wooden panels”).
- Optionally, upload an Aisle Image.
- Click Create to add the aisle, or Cancel to close the form.
Once created, the new aisle appears in the Aisle view list under the selected zone.
When the user clicks the Edit icon on an aisle card, the same modal used for creating an aisle opens with pre-filled details.
- The Zone field remains the same as the existing one.
- You can update the Aisle Name.
- You can update the Description.
- Optionally, change or re-upload the Aisle Image.
- Click Save (or Update) to apply the changes.
The updated aisle details will immediately reflect on the aisle card view.
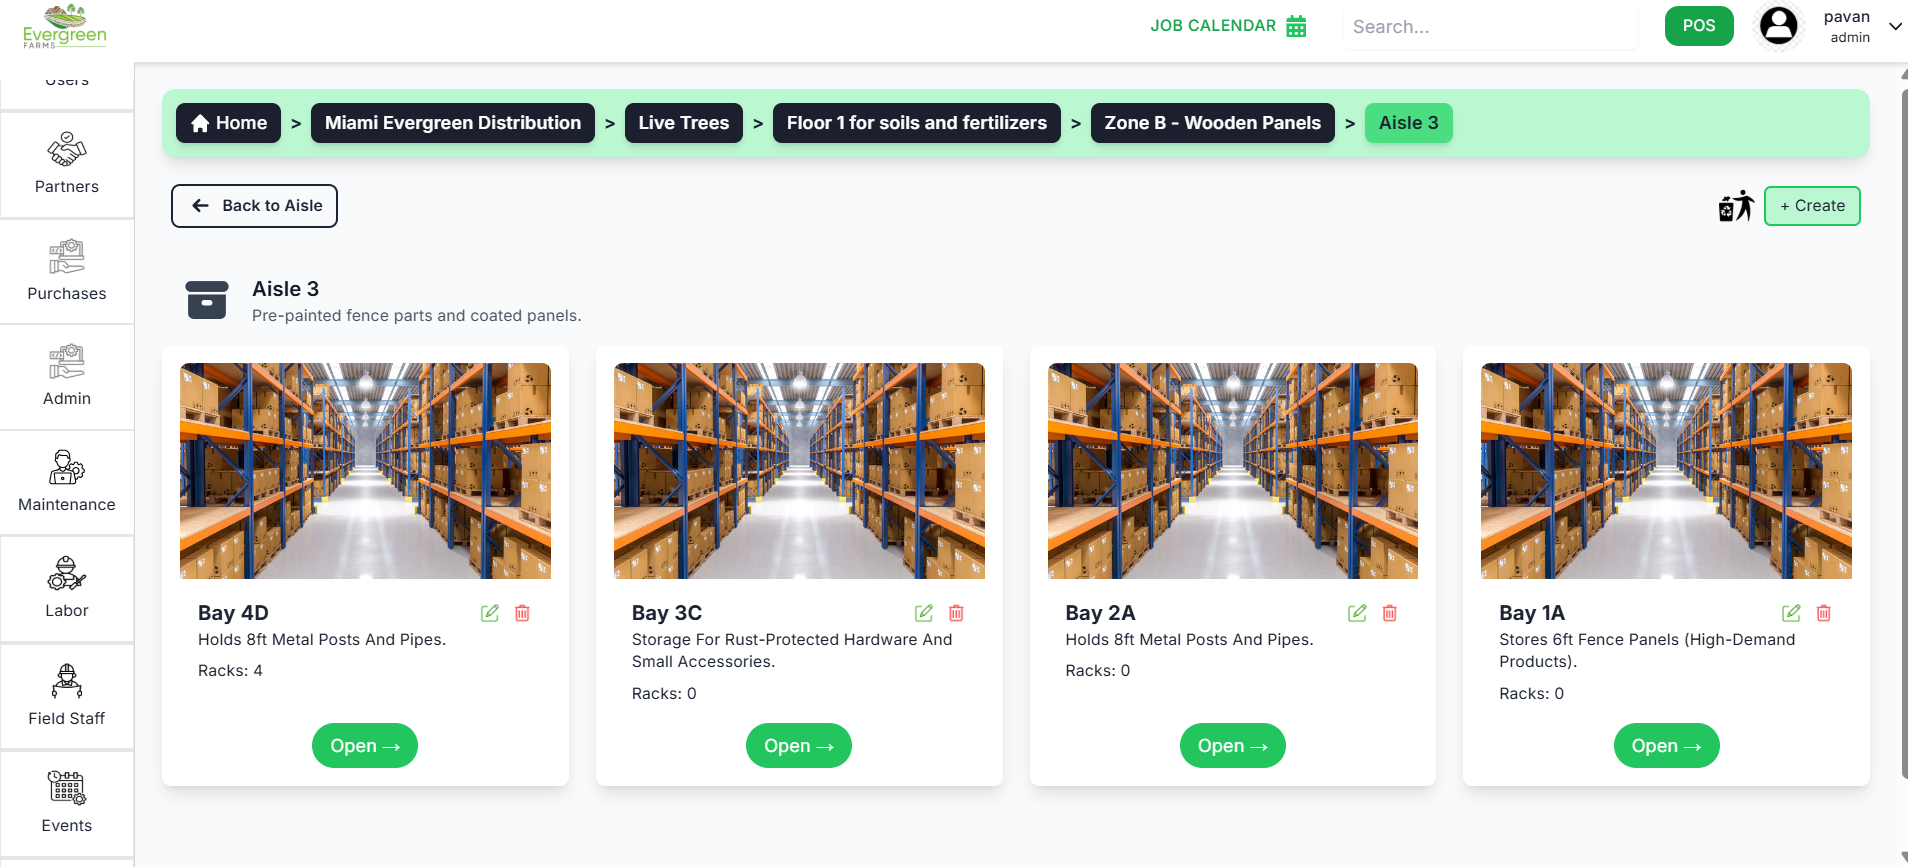
The Bay section helps organize and manage bays within a selected aisle. Each bay represents a specific storage location inside the warehouse where products or materials are stored.
✅ What you can do here:
- View all existing bays as individual cards under the selected aisle.
- Each card displays key information such as:
- Bay Name (e.g., Bay 4D, Bay 3C, etc.)
- Description (e.g., "Holds 8ft Metal Posts And Pipes")
- Racks count (e.g., "Racks: 4")
- Status (Open or other status indicators)
- Use the "+ Create" button to add a new bay.
- Use the Edit icon on a card to update bay details.
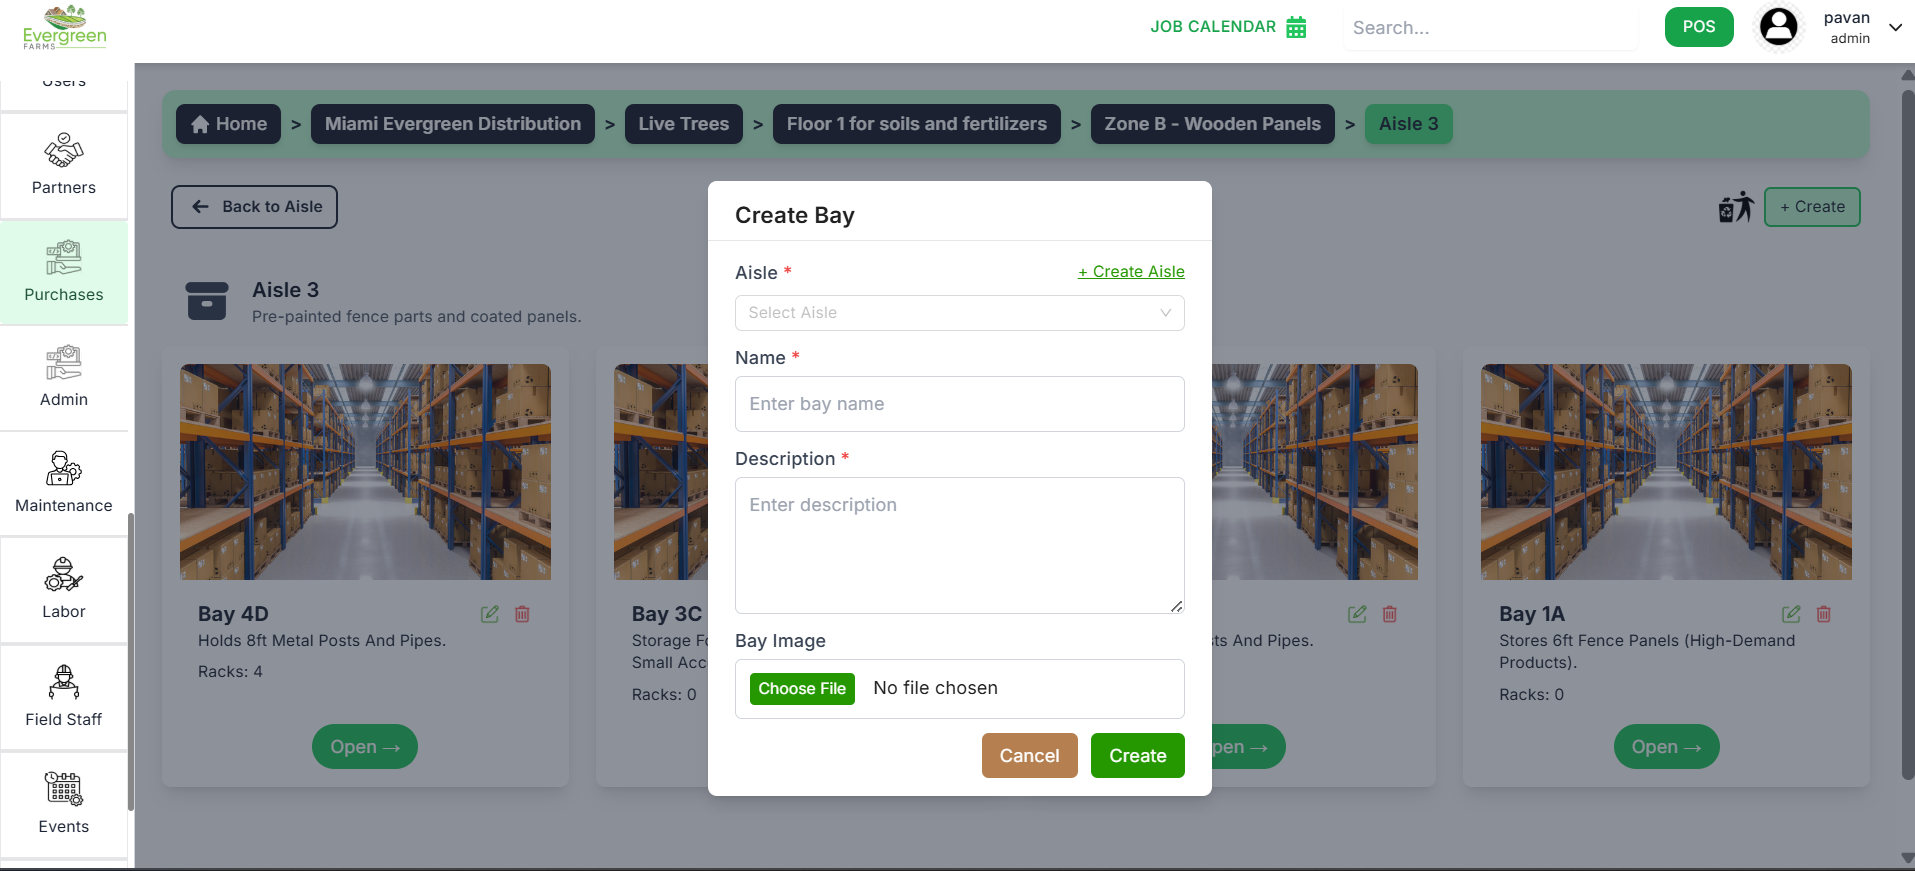
When the user clicks the "+ Create" button, a popup modal appears to create a new bay under the selected aisle.
- The Aisle field automatically displays the current aisle name (non-editable).
- Enter Bay Name (e.g., Bay 4D).
- Enter Description (brief details about the bay, e.g., "Holds 8ft Metal Posts And Pipes").
- Optionally, upload a Bay Image.
- Click Create to add the bay, or Cancel to close the form.
Once created, the new bay appears in the Bay view list under the selected aisle.
When the user clicks the Edit icon on a bay card, the same modal used for creating a bay opens with pre-filled details.
- The Aisle field remains the same as the existing one.
- You can update the Bay Name.
- You can update the Description.
- Optionally, change or re-upload the Bay Image.
- Click Save (or Update) to apply the changes.
The updated bay details will immediately reflect on the bay card view.
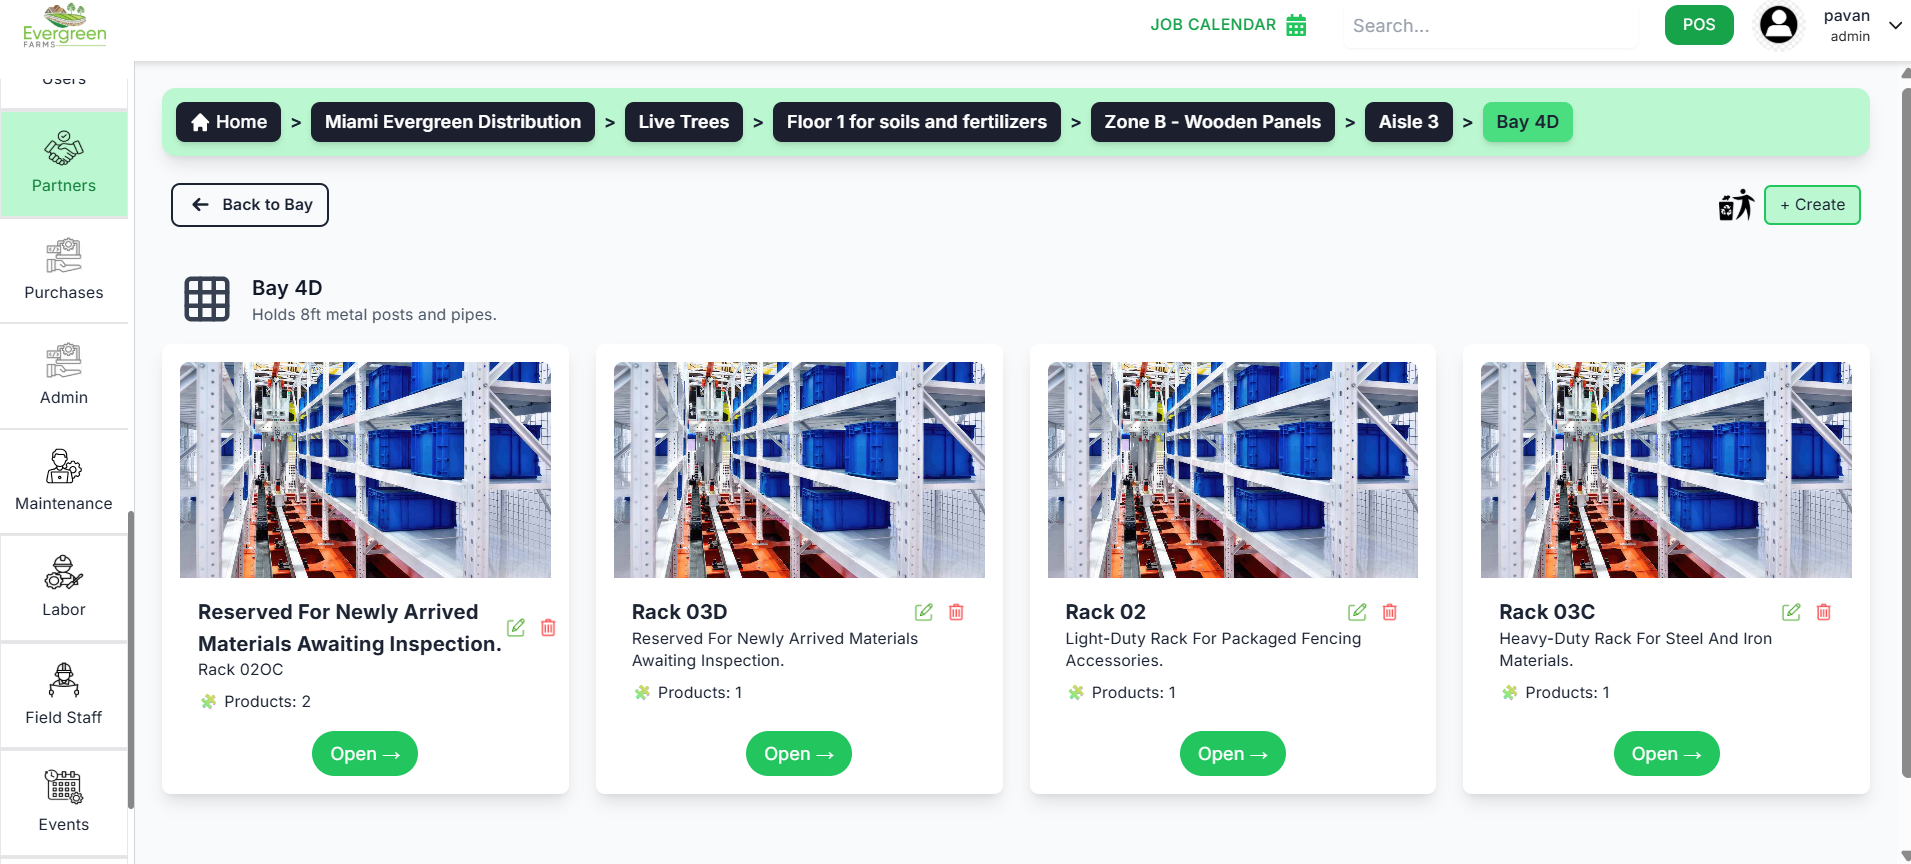
The Rack section helps organize and manage racks within a selected bay. Each rack represents a specific storage unit inside the warehouse where products are placed.
✅ What you can do here:
- View all existing racks as individual cards under the selected bay.
- Each card displays key information such as:
- Rack Name (e.g., Rack 02C)
- Description (e.g., “Reserved For Newly Arrived Materials”)
- Products count
- Upon clicking "Open -> " button , you can view the specific products that can be placed in the selected rack.
- Use the “+ Create” button to add a new rack.
- Use the Edit icon on a card to update rack details.
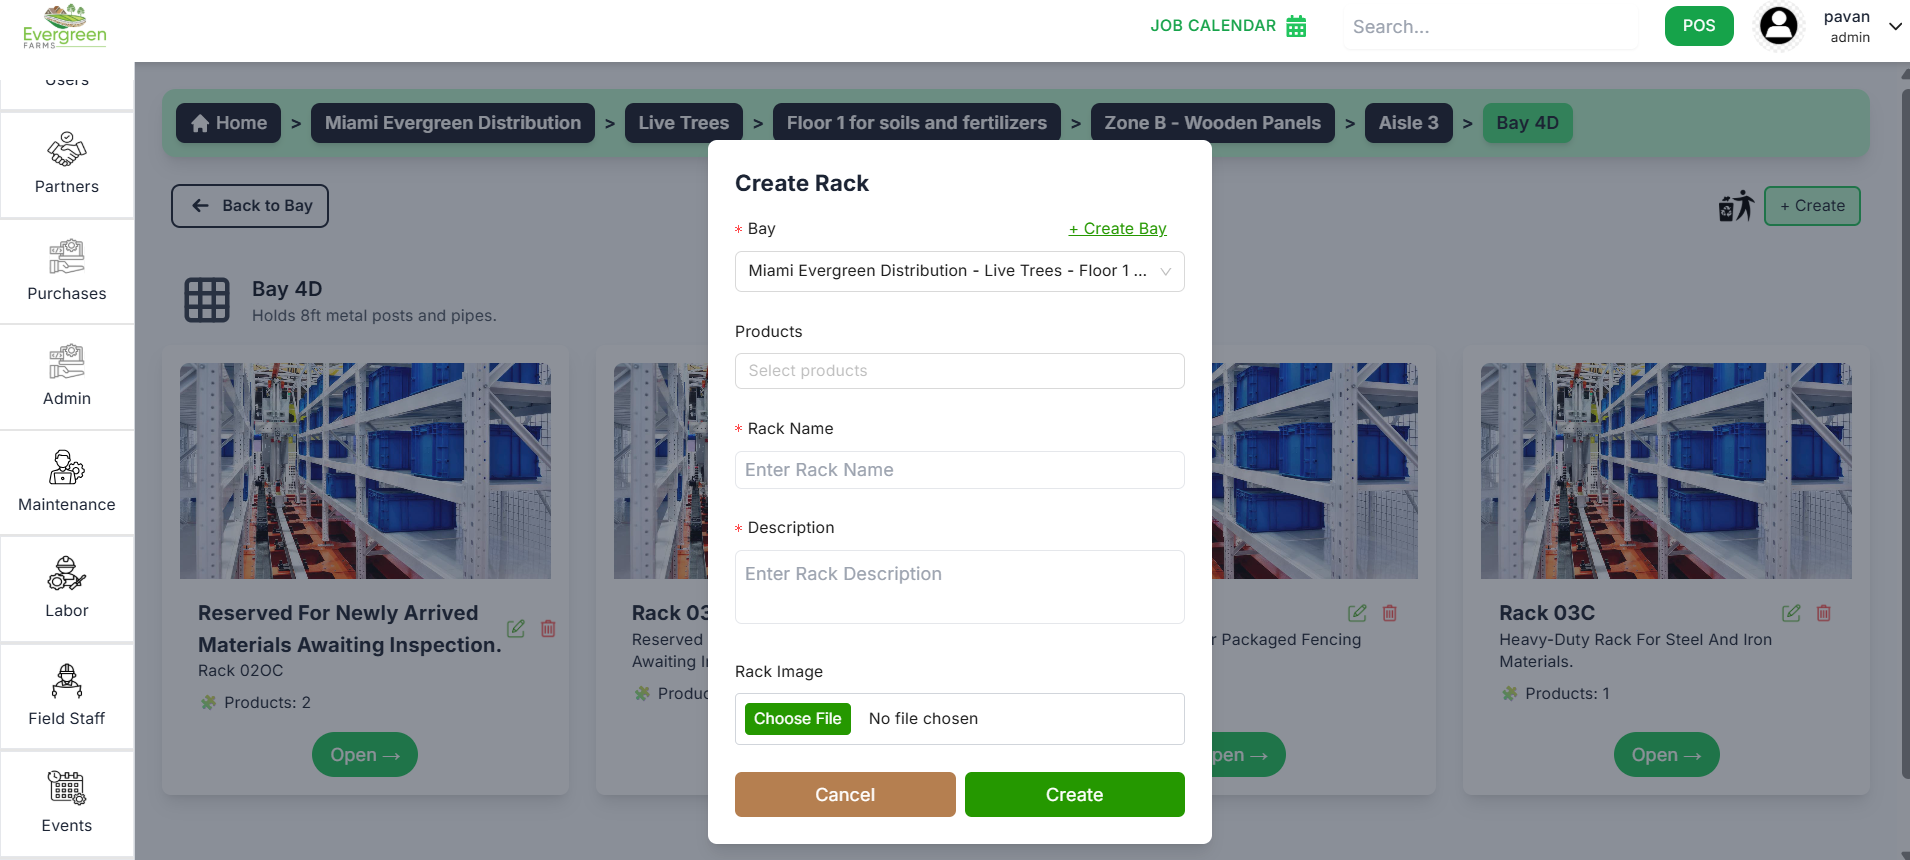
When the user clicks the “+ Create” button, a popup modal appears to create a new rack under the selected bay.
- The Bay field automatically displays the current bay name (non-editable).
- Enter Rack Name (e.g., Rack 03D).
- Enter Description (brief details about the rack, e.g., “Holds 8 ft metal posts and pipes”).
- Optionally, upload a Rack Image.
- Click Create to add the rack, or Cancel to close the form.
Once created, the new rack appears in the Rack view list under the selected bay.
When the user clicks the Edit icon on a rack card, the same modal used for creating a rack opens with pre-filled details.
- The Bay field remains the same as the existing one.
- You can update the Rack Name.
- You can update the Description.
- Optionally, change or re-upload the Rack Image.
- Click Save (or Update) to apply the changes.
The updated rack details will immediately reflect on the rack card view.